
How to run your restaurant with eateasy
Every real screen step by step: from the 2-minute setup, reservation list, 14-day table calendar and settings all the way through all four steps of the guest booking flow.
1 · Getting Started
Homepage & Product Overview
At eateasy.cc, restaurant owners start their 14-day free trial directly without a sales call — or try the interactive live demo first.
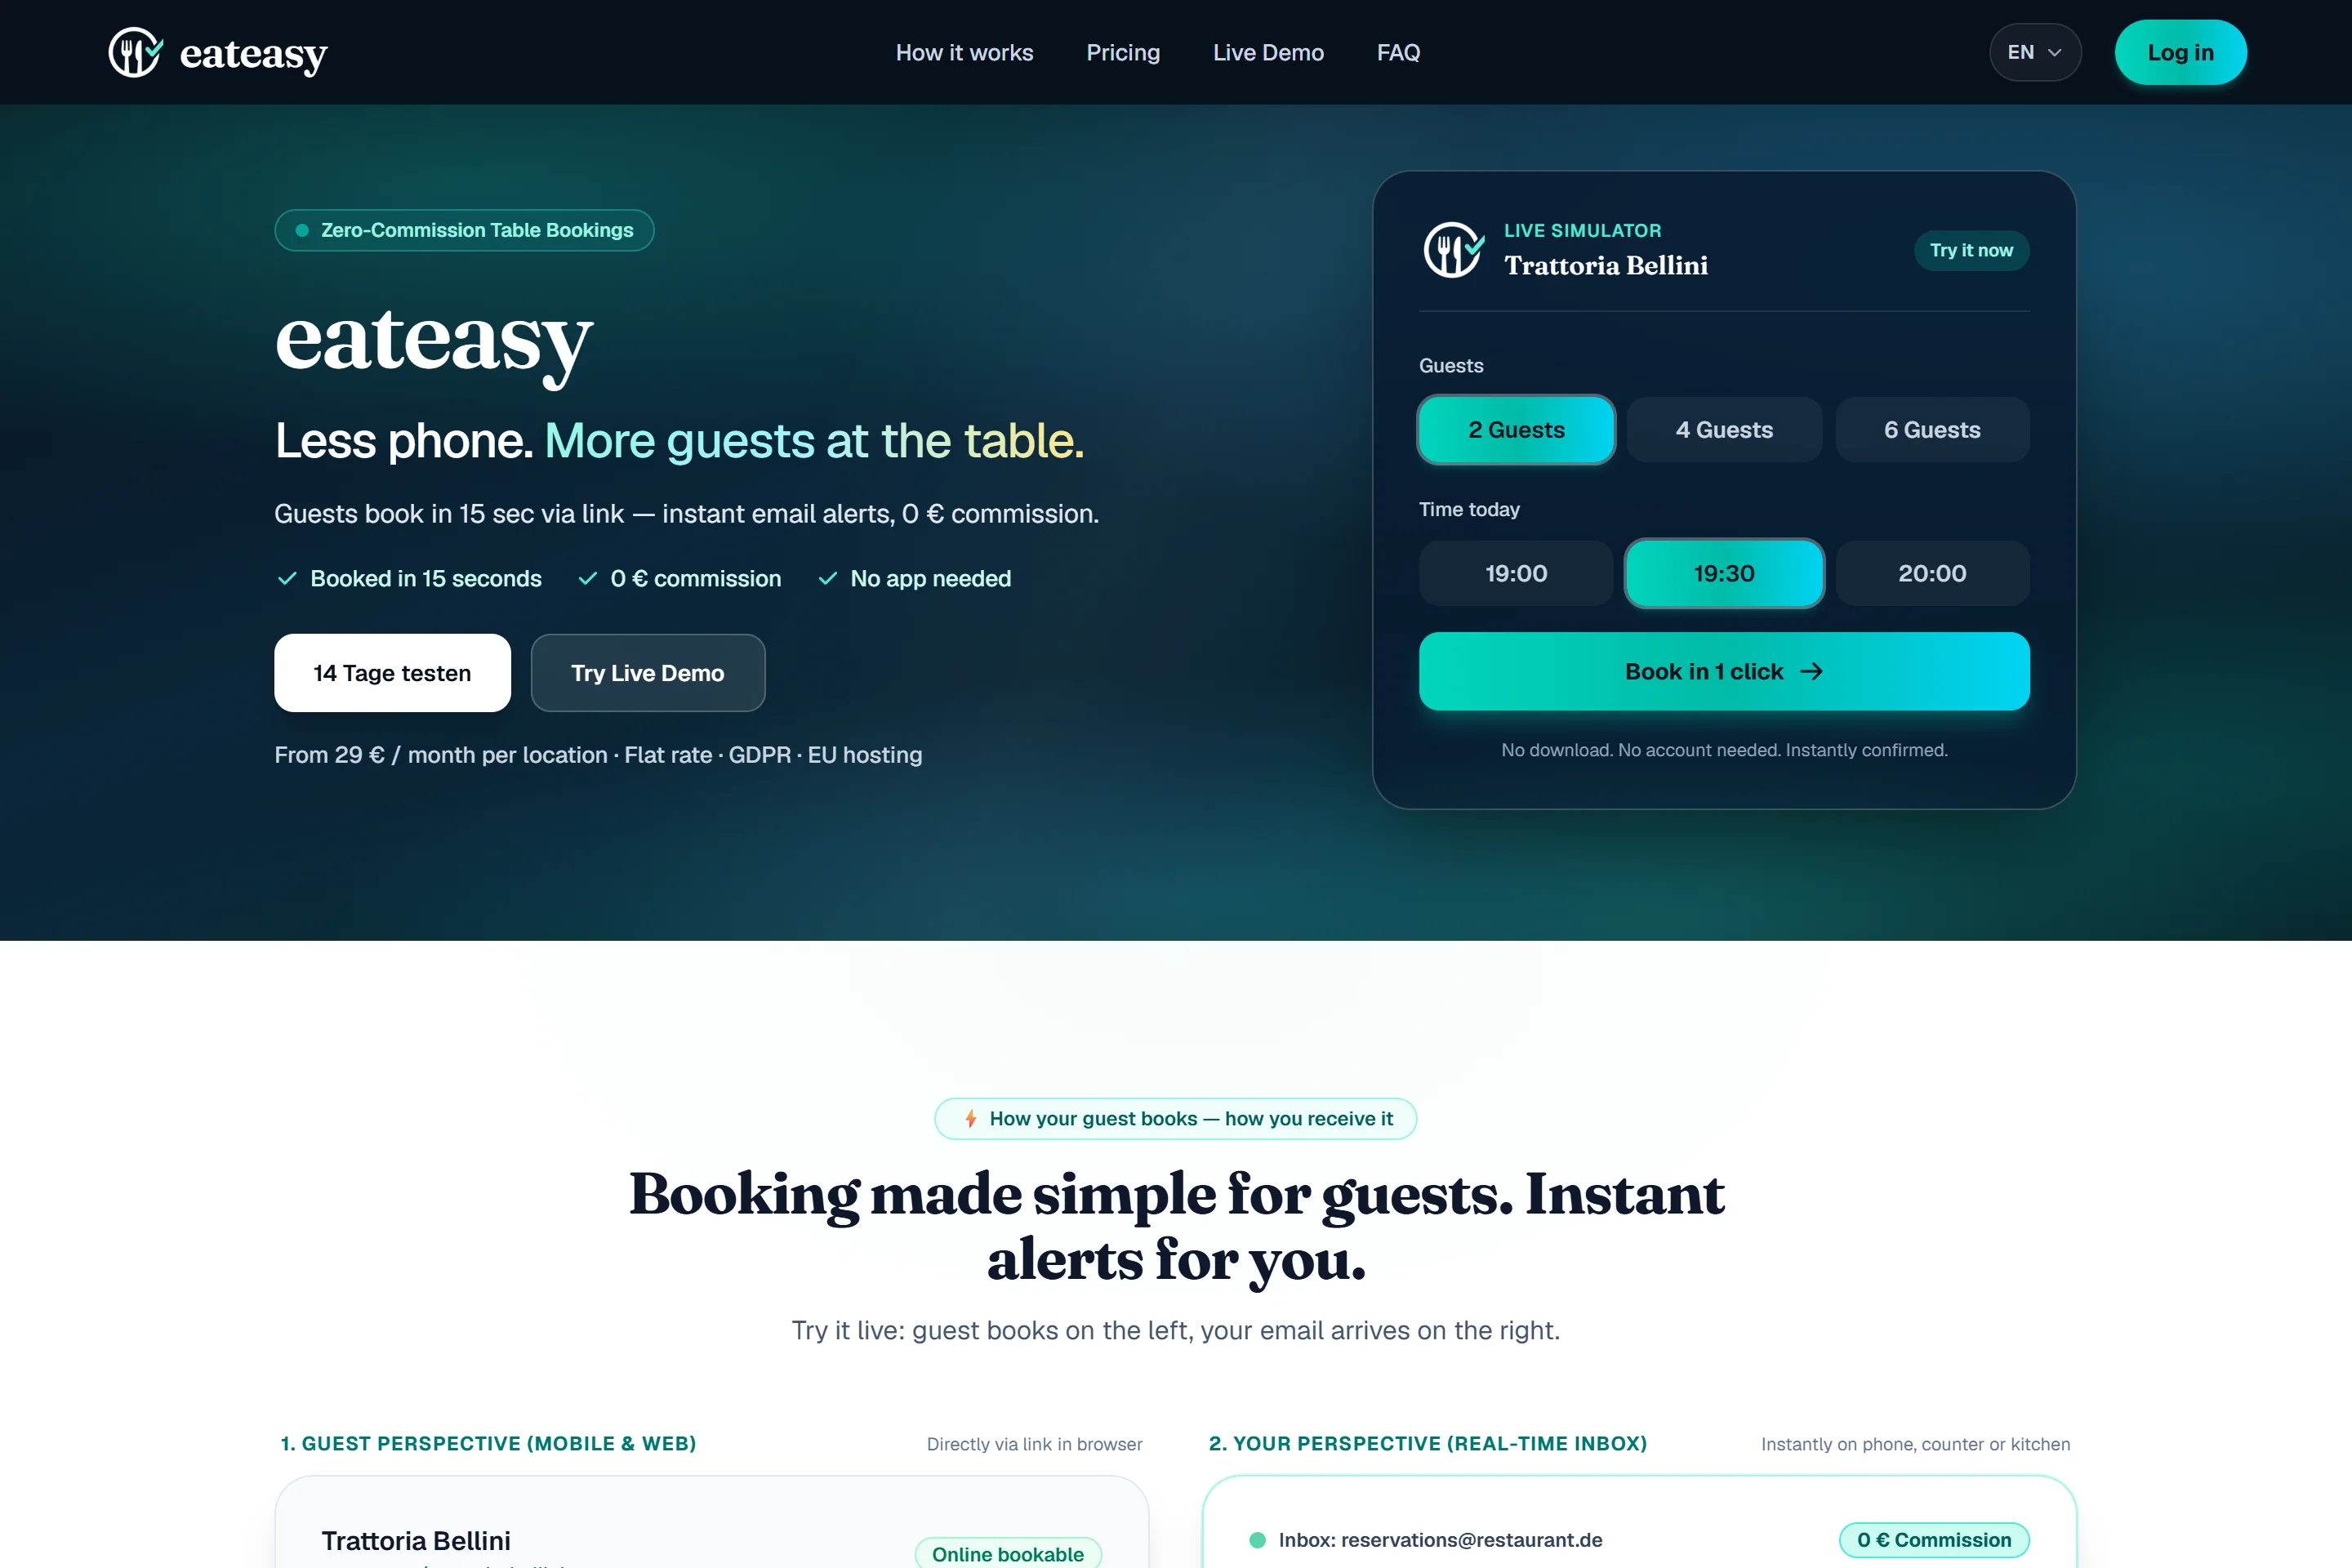
- ✓€29/month flat rate per location, €0 commission per guest.
- ✓Sign in via Google or 1-click Magic Link with no password.
2 · Setup
2-Minute Onboarding
On first login, set up your venue step by step: name, address, shifts/opening hours, closed weekdays, stay duration and table inventory (2-top, 4-top, 6-top, 8-top).
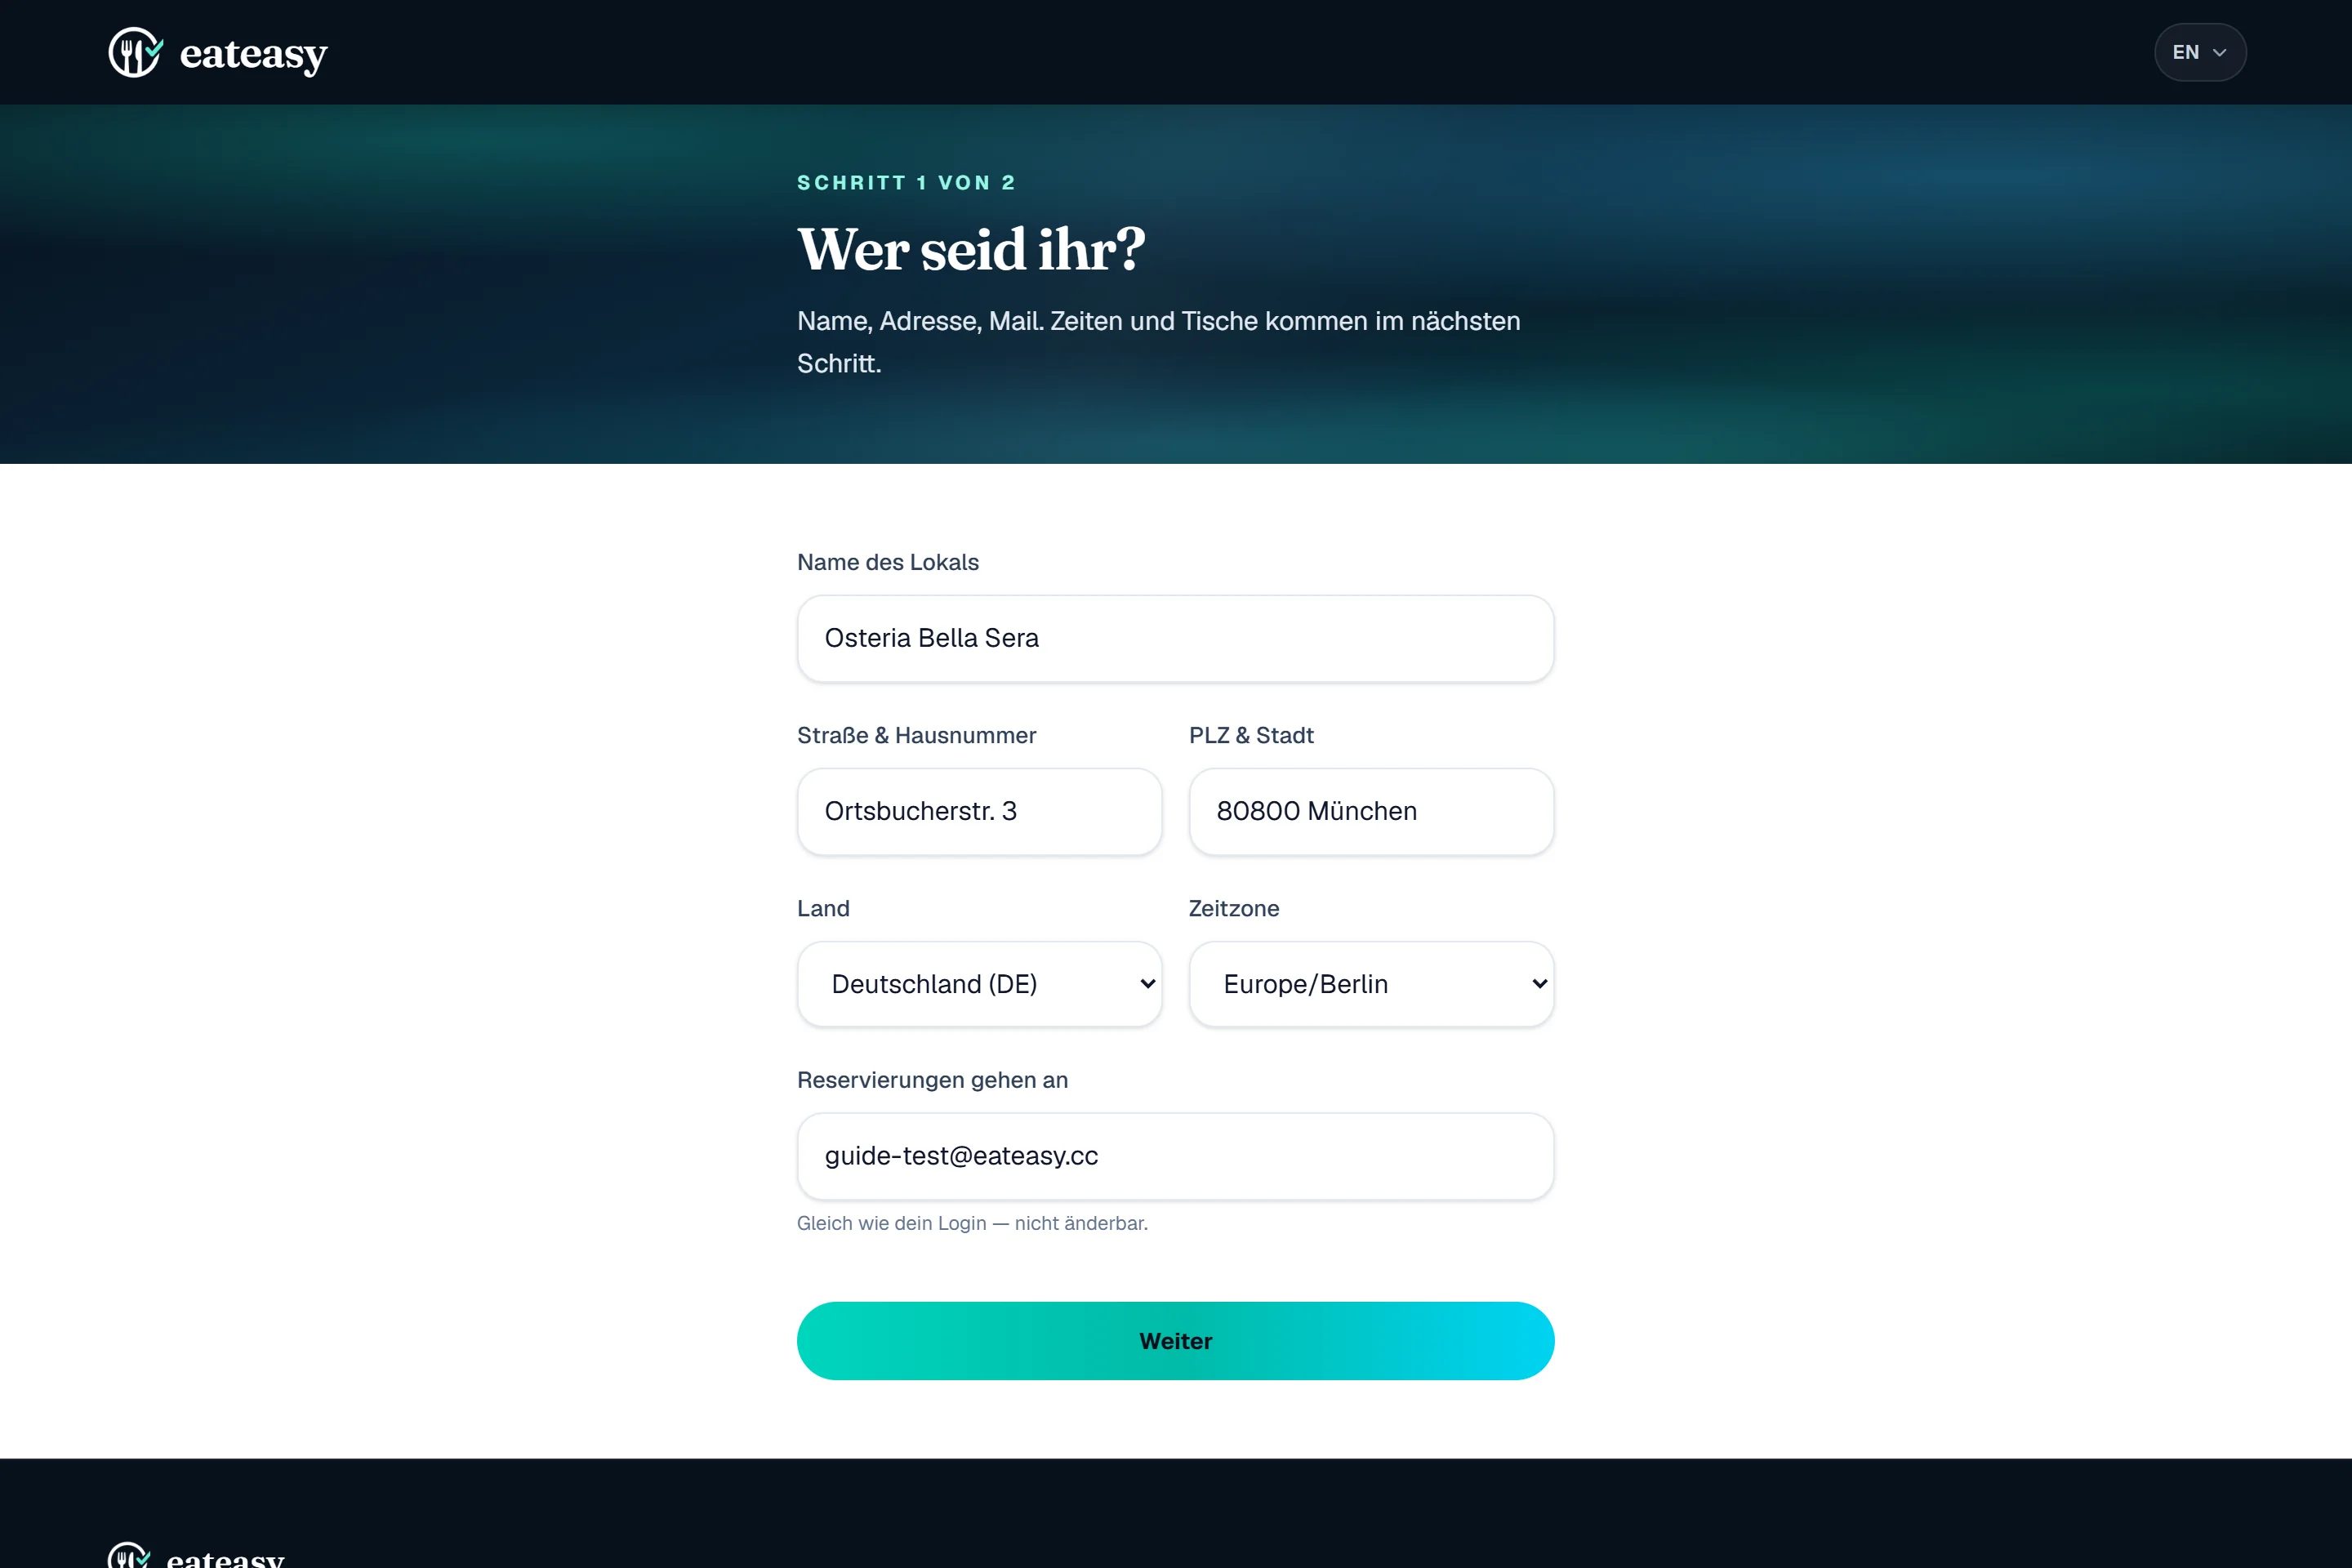
- ✓Once saved, your dedicated booking link goes live immediately.
3 · Cockpit
Portal Overview (“Your Venues”)
In the portal at portal.eateasy.cc, see every venue at a glance including live status, view counts, and direct links to the public booking page or management.
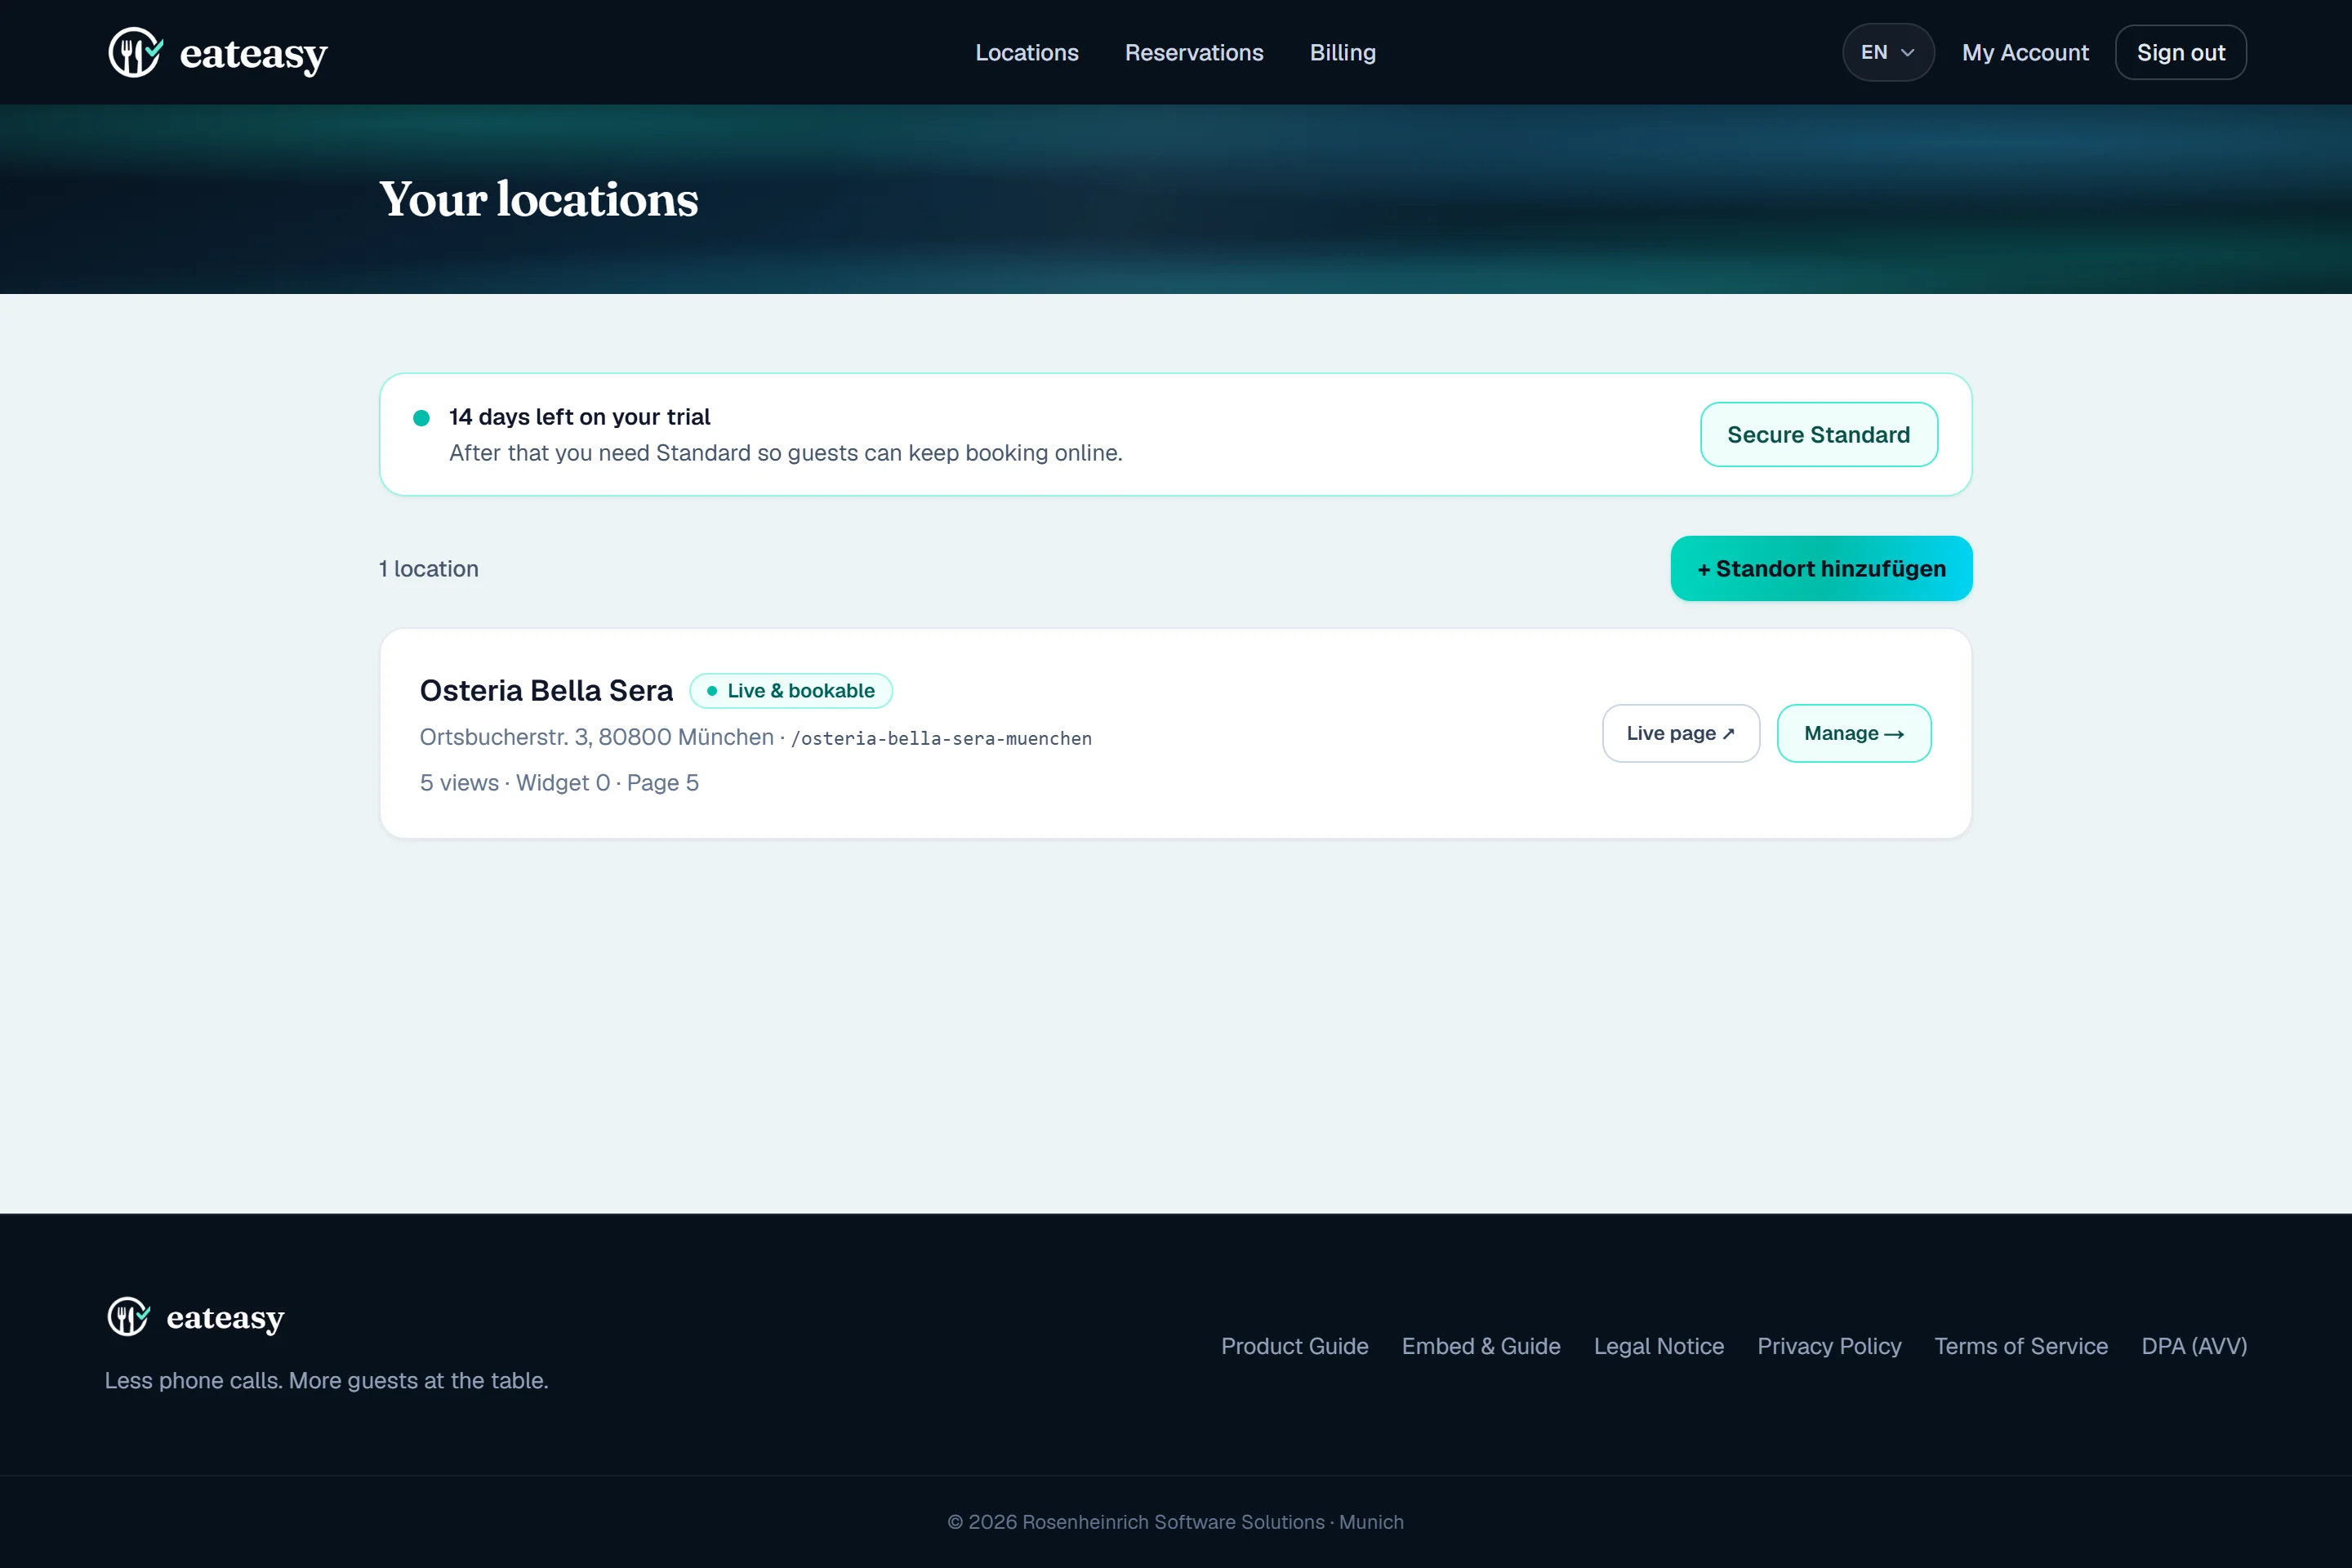
- ✓Multi-location ready via “+ Add location”.
- ✓Trial/subscription banner, live badge and reach counter at a glance.
4 · Daily Service
Reservation List (“List”)
The list view is your service hub: all reservations grouped by day with guest details, party size, notes and status.
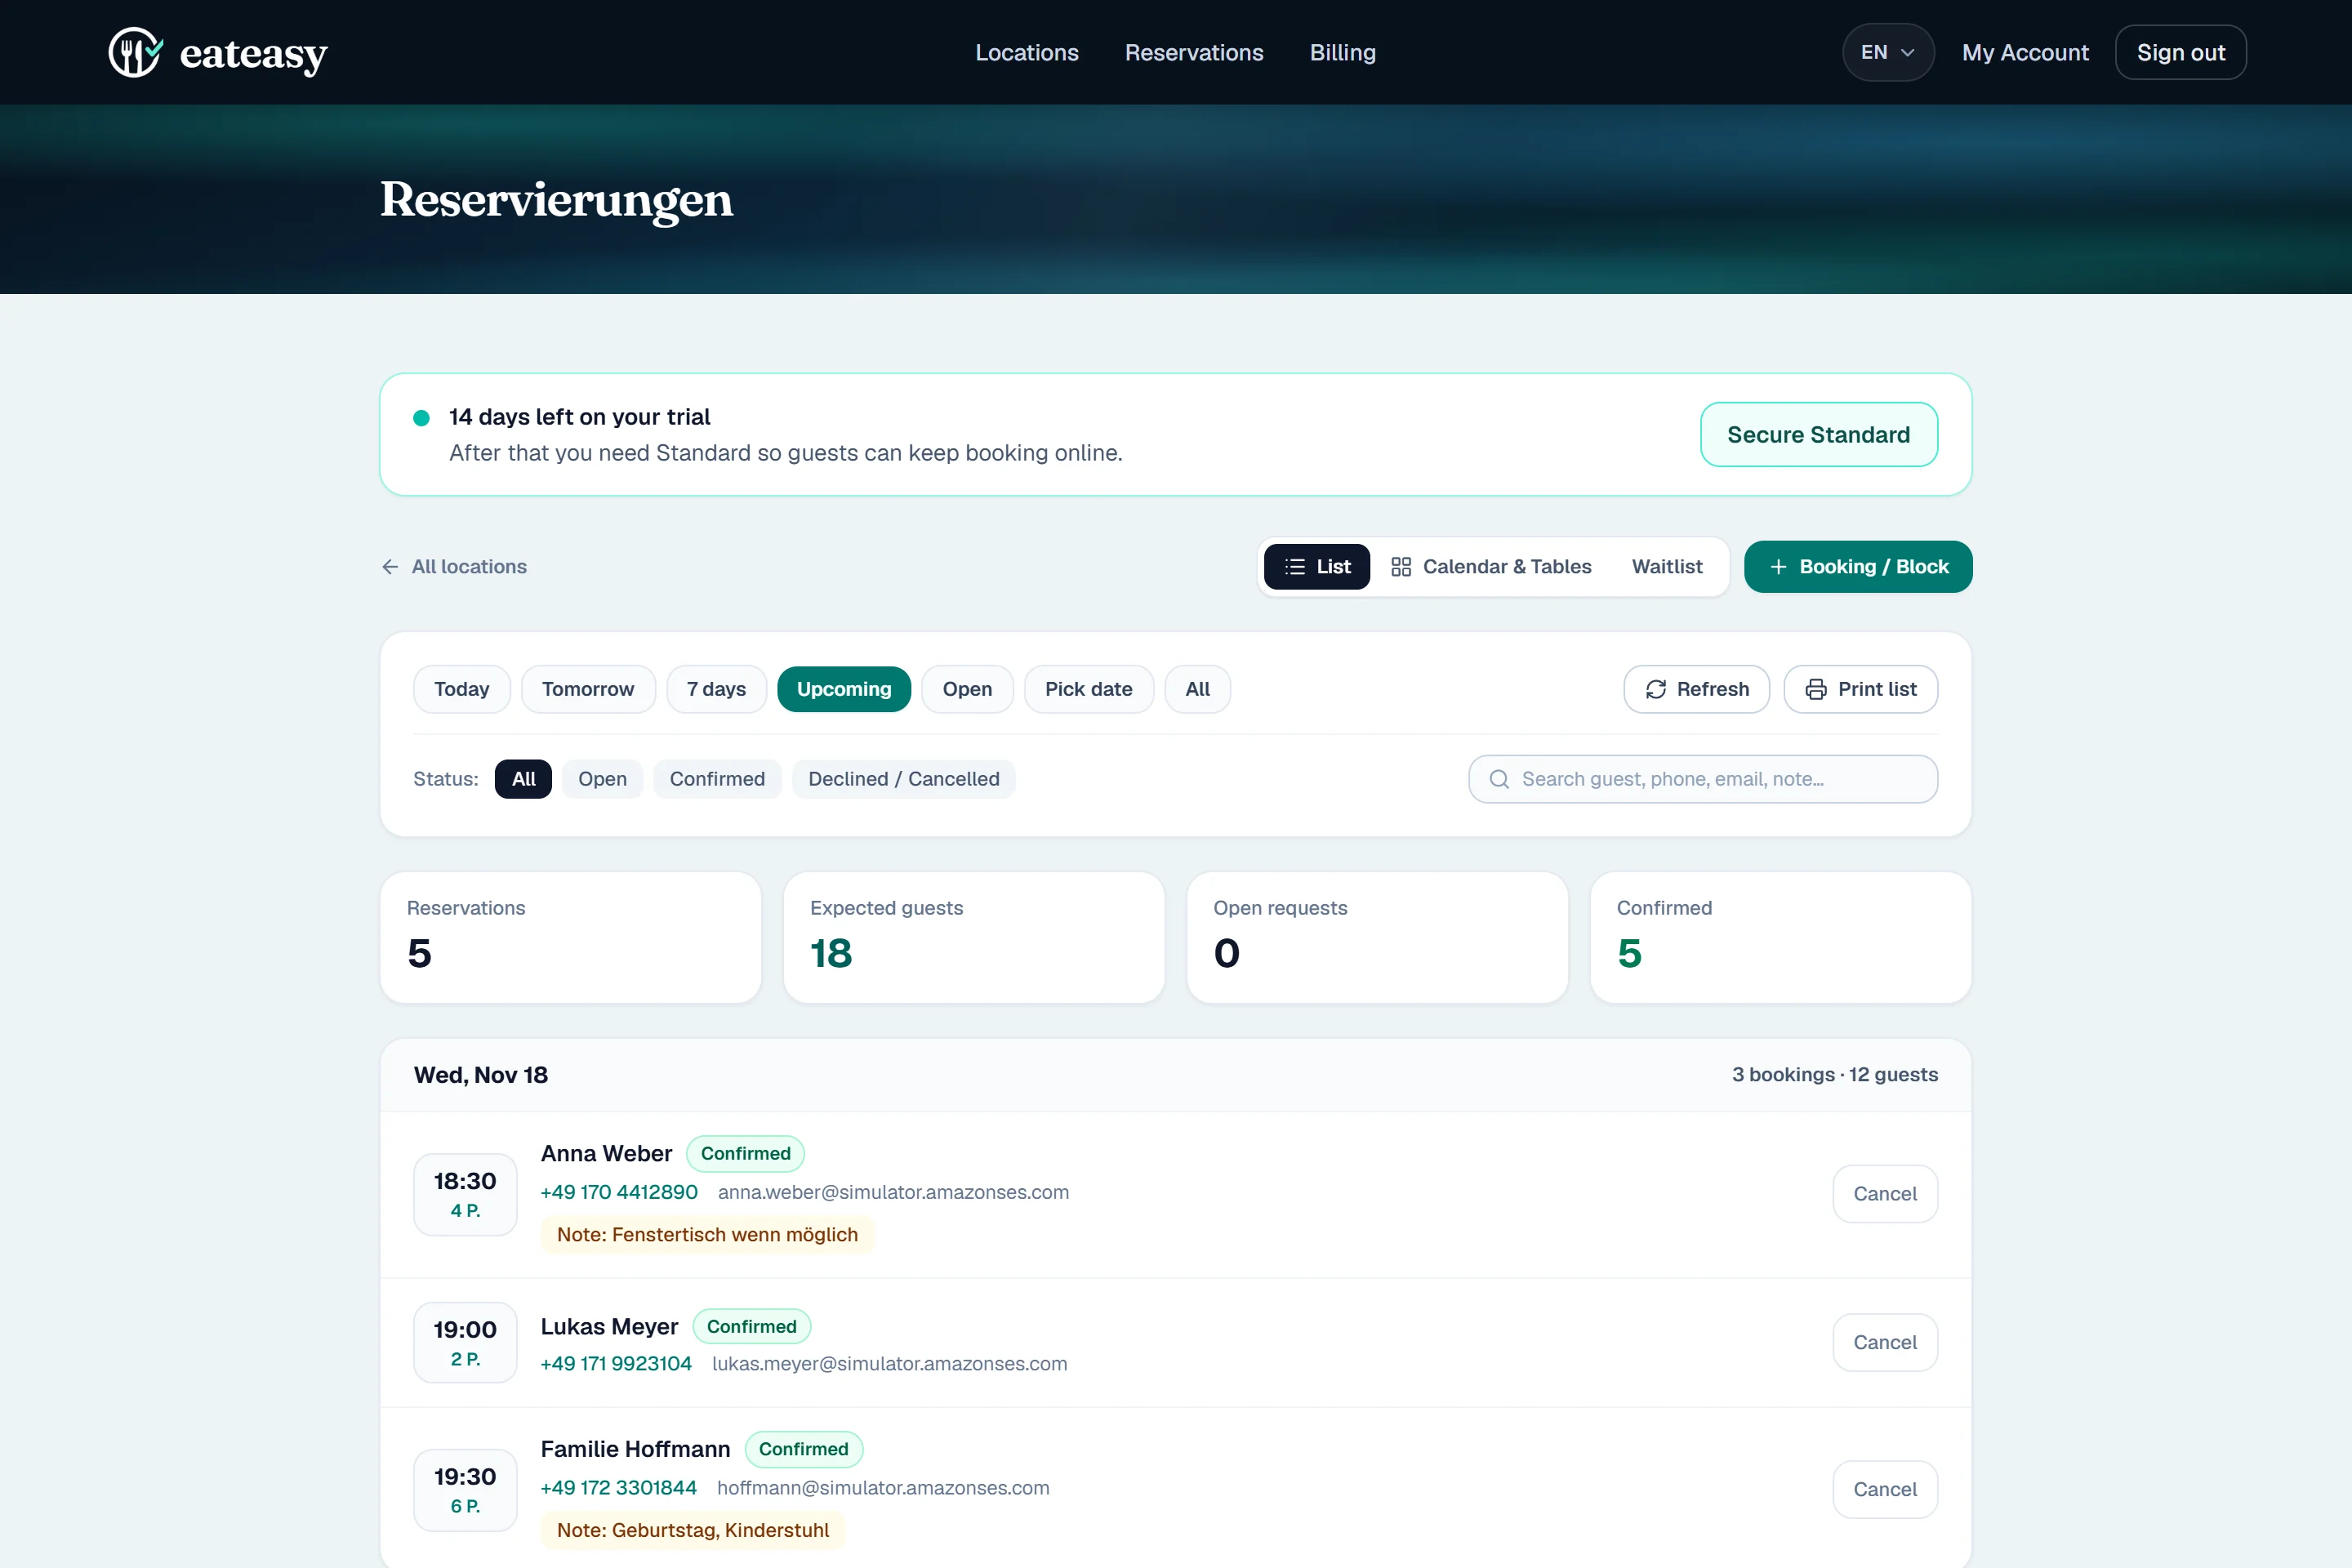
- ✓Quick filters: Today, Tomorrow, 7 Days, Upcoming, Pending or by date/status.
- ✓Cancelled bookings are excluded from guest totals.
- ✓Click “Print” for a clean A4 host-stand checklist.
5 · Capacity & Planning
14-Day Calendar & Tables
In the “Calendar & Tables” tab, inspect utilization across the next 14 days and every single time slot including stay-duration overlap — broken down by free 2-, 4- and 6-top tables.
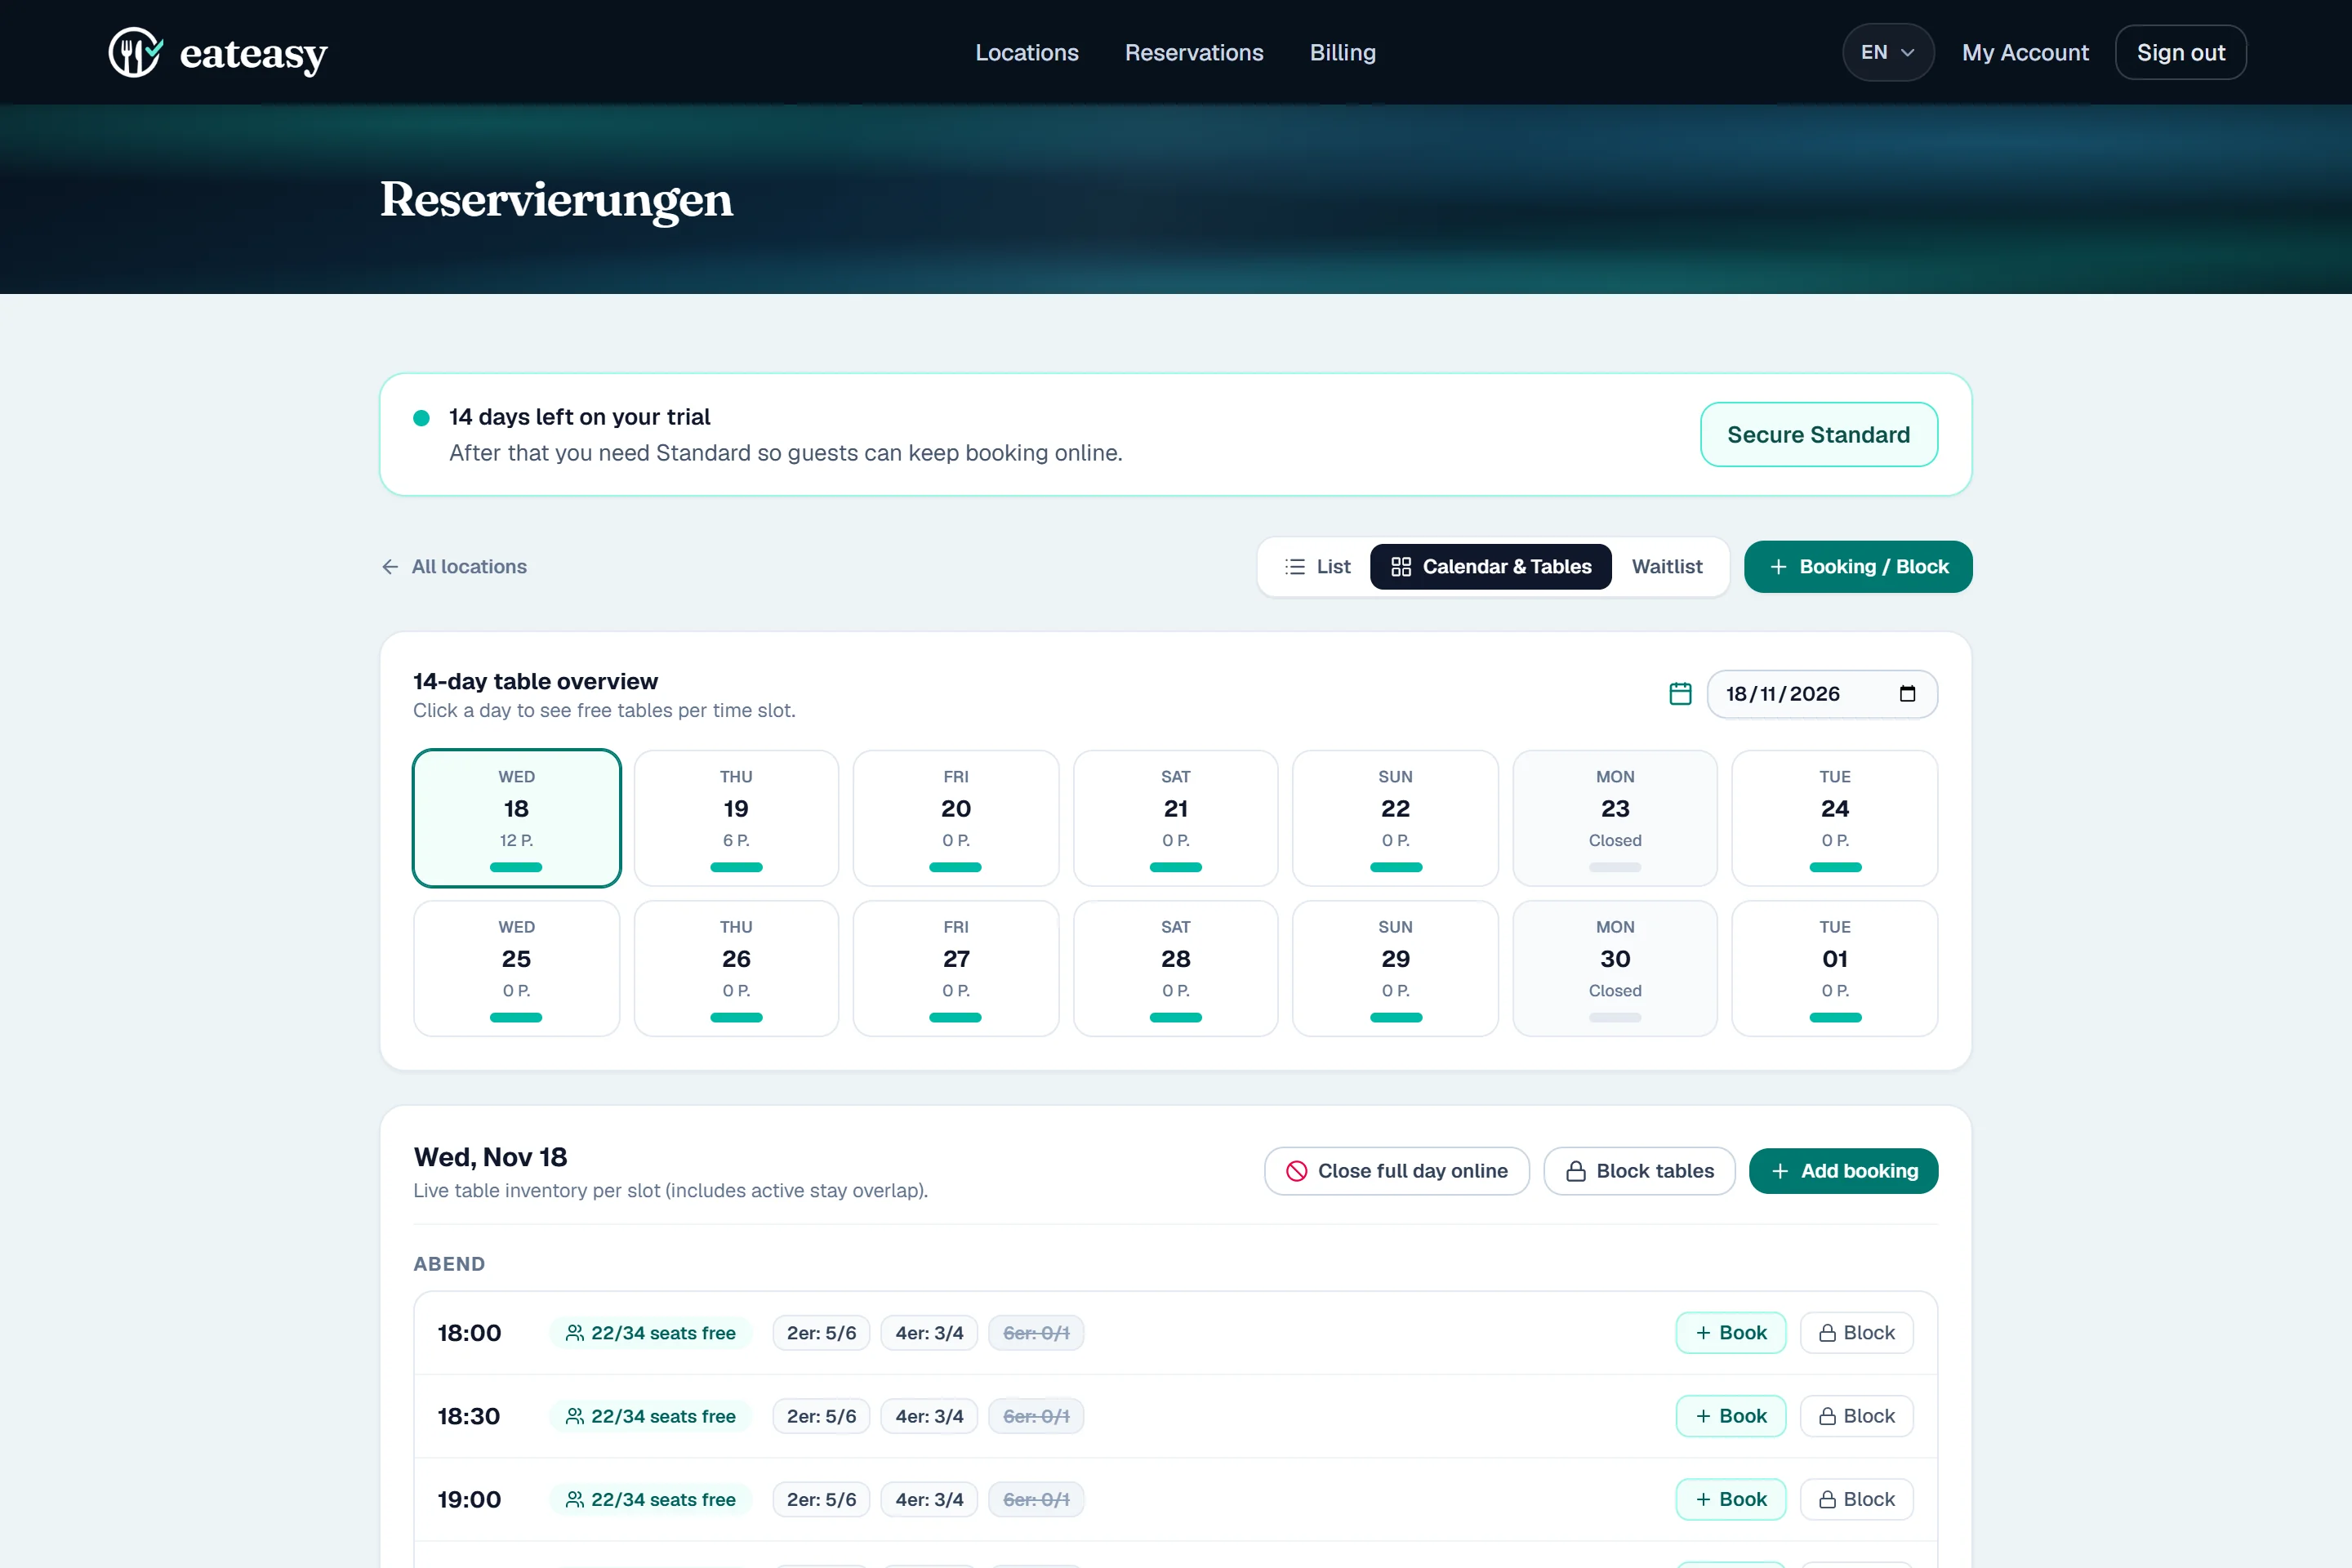
- ✓React directly from any slot with “+ Add” or “Block”.
- ✓Past days stay readable without risking accidental new entries.
6 · Phone & Walk-ins
Add Manual Booking or Table Block
When a guest calls or walks in, log the booking in seconds via “+ Booking / Block” — or block specific tables or an entire day from online bookings.
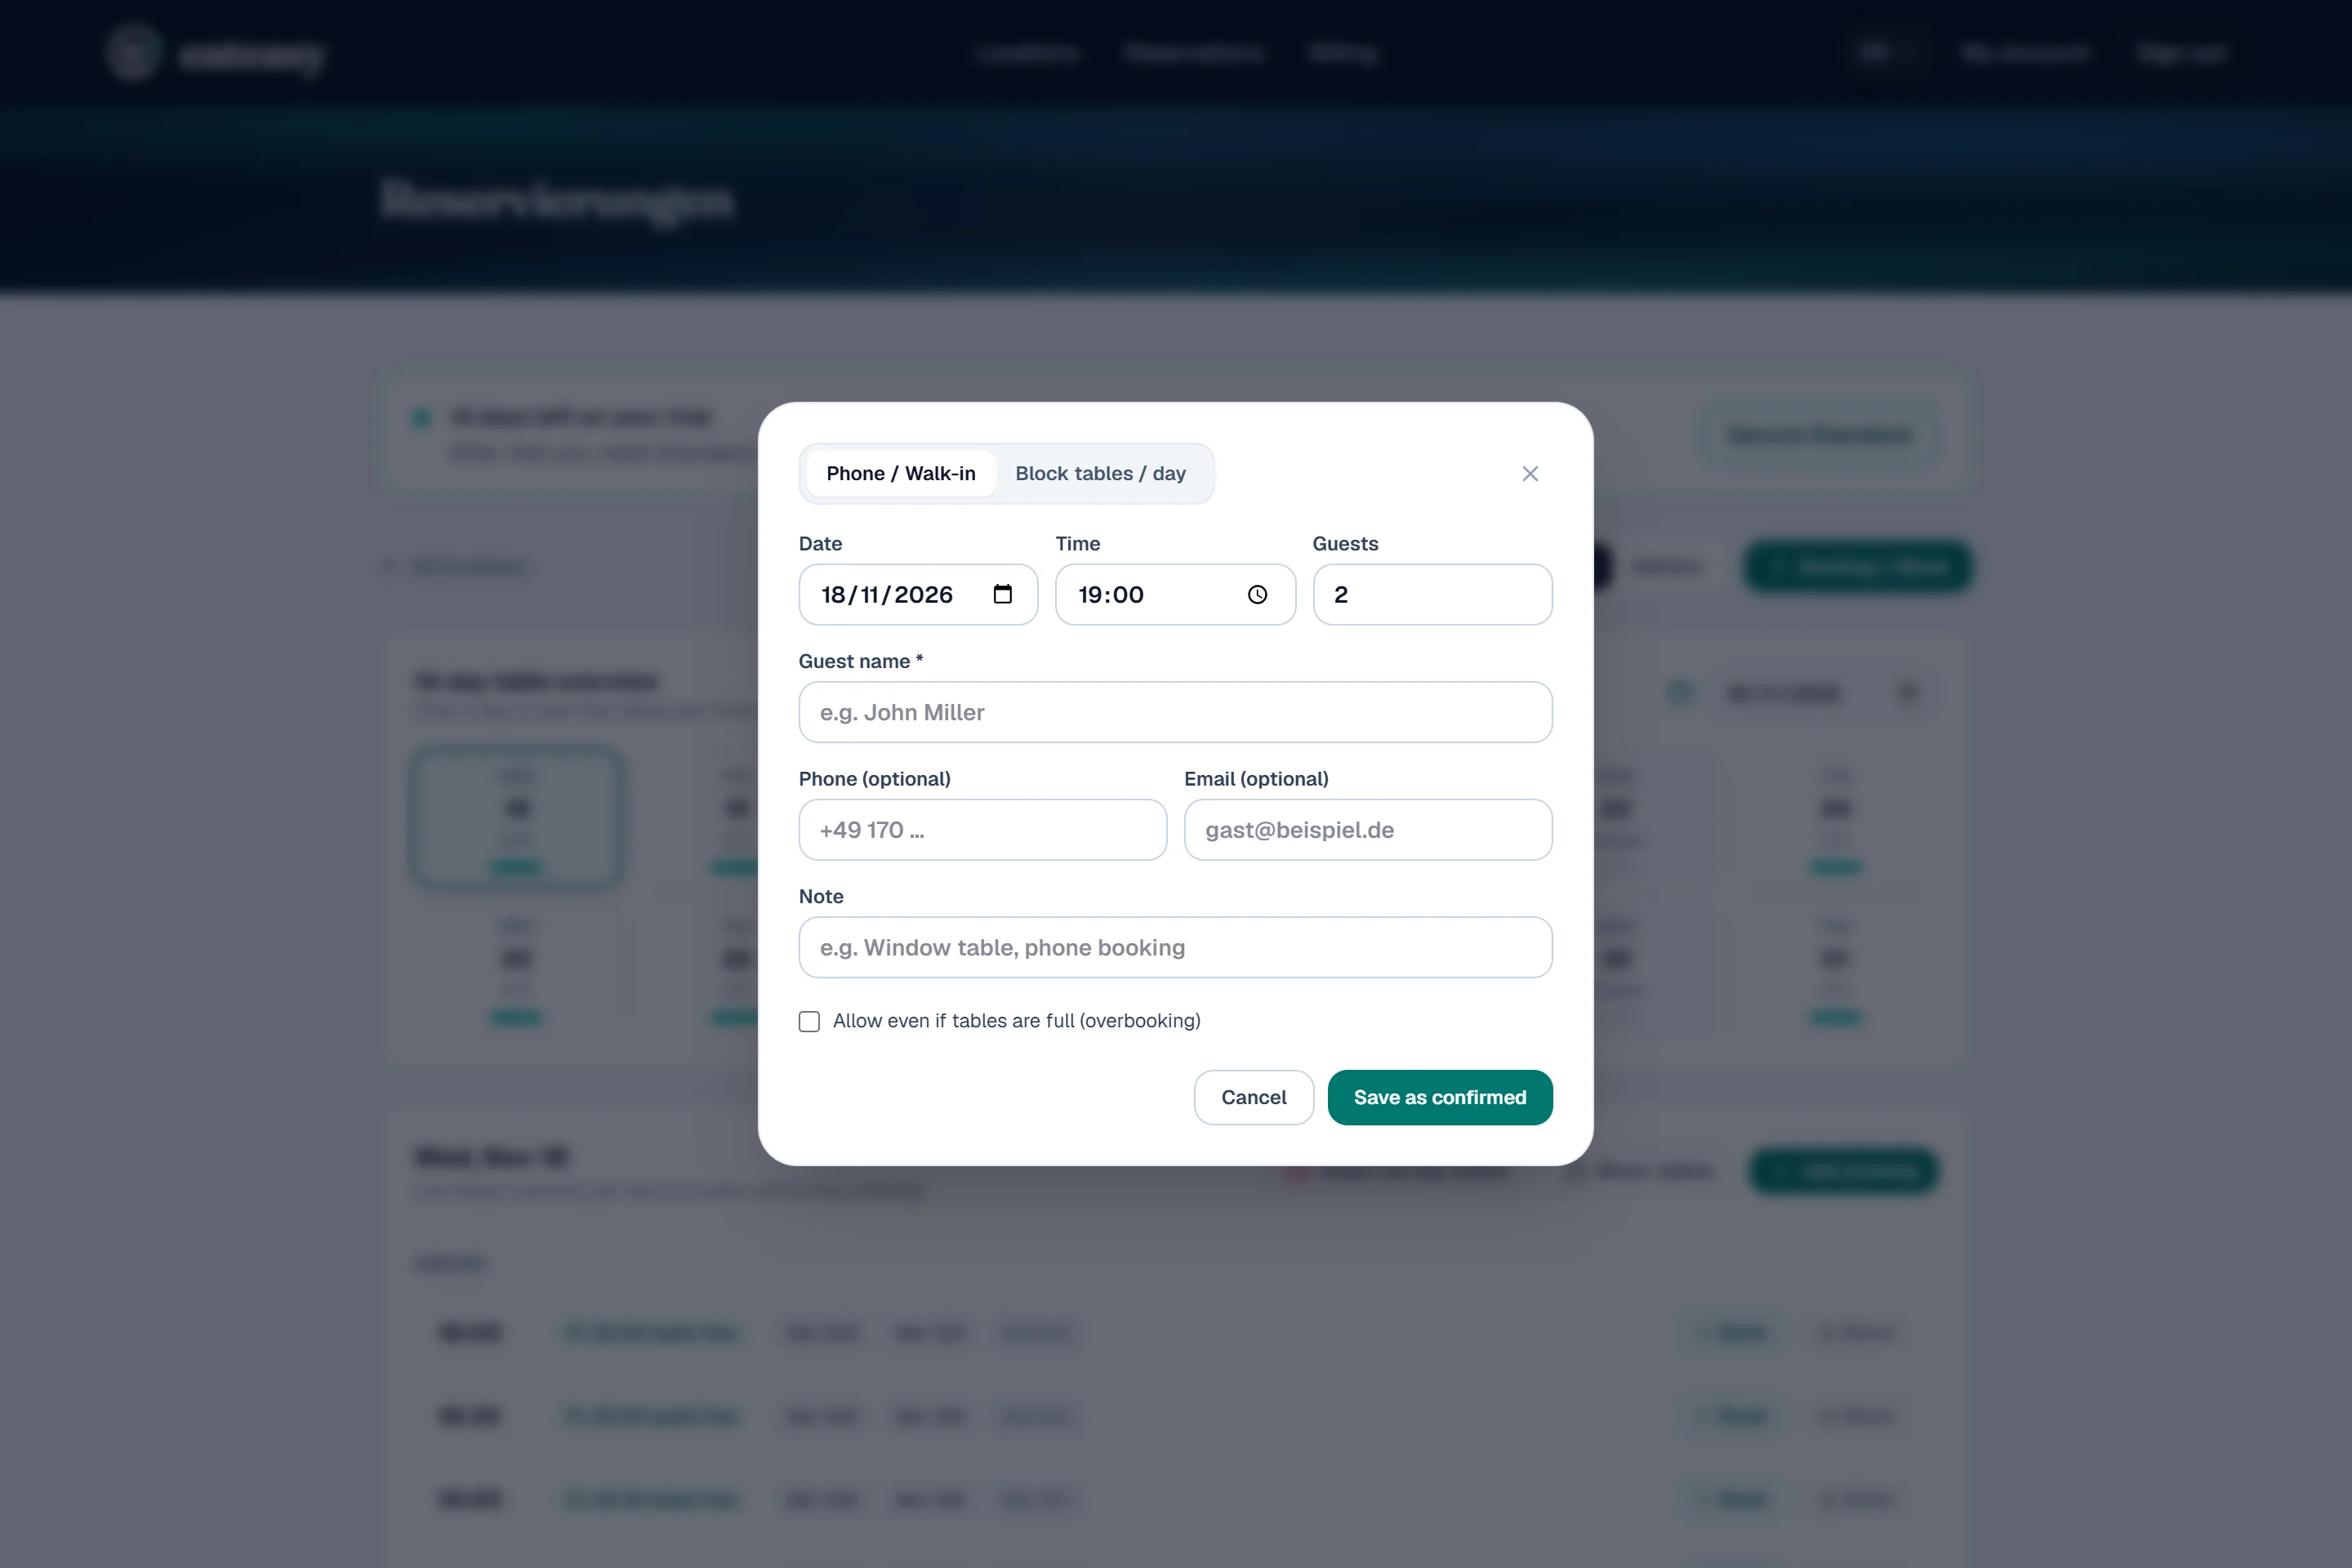
- ✓Phone and online bookings share the exact same table pool — zero double bookings.
7 · Configuration
Venue Settings & Confirmation Mode
Under Manage → Settings, adjust venue details, shifts, custom weekday hours, stay duration, confirmation mode (Instant vs. Manual) and the waitlist anytime.
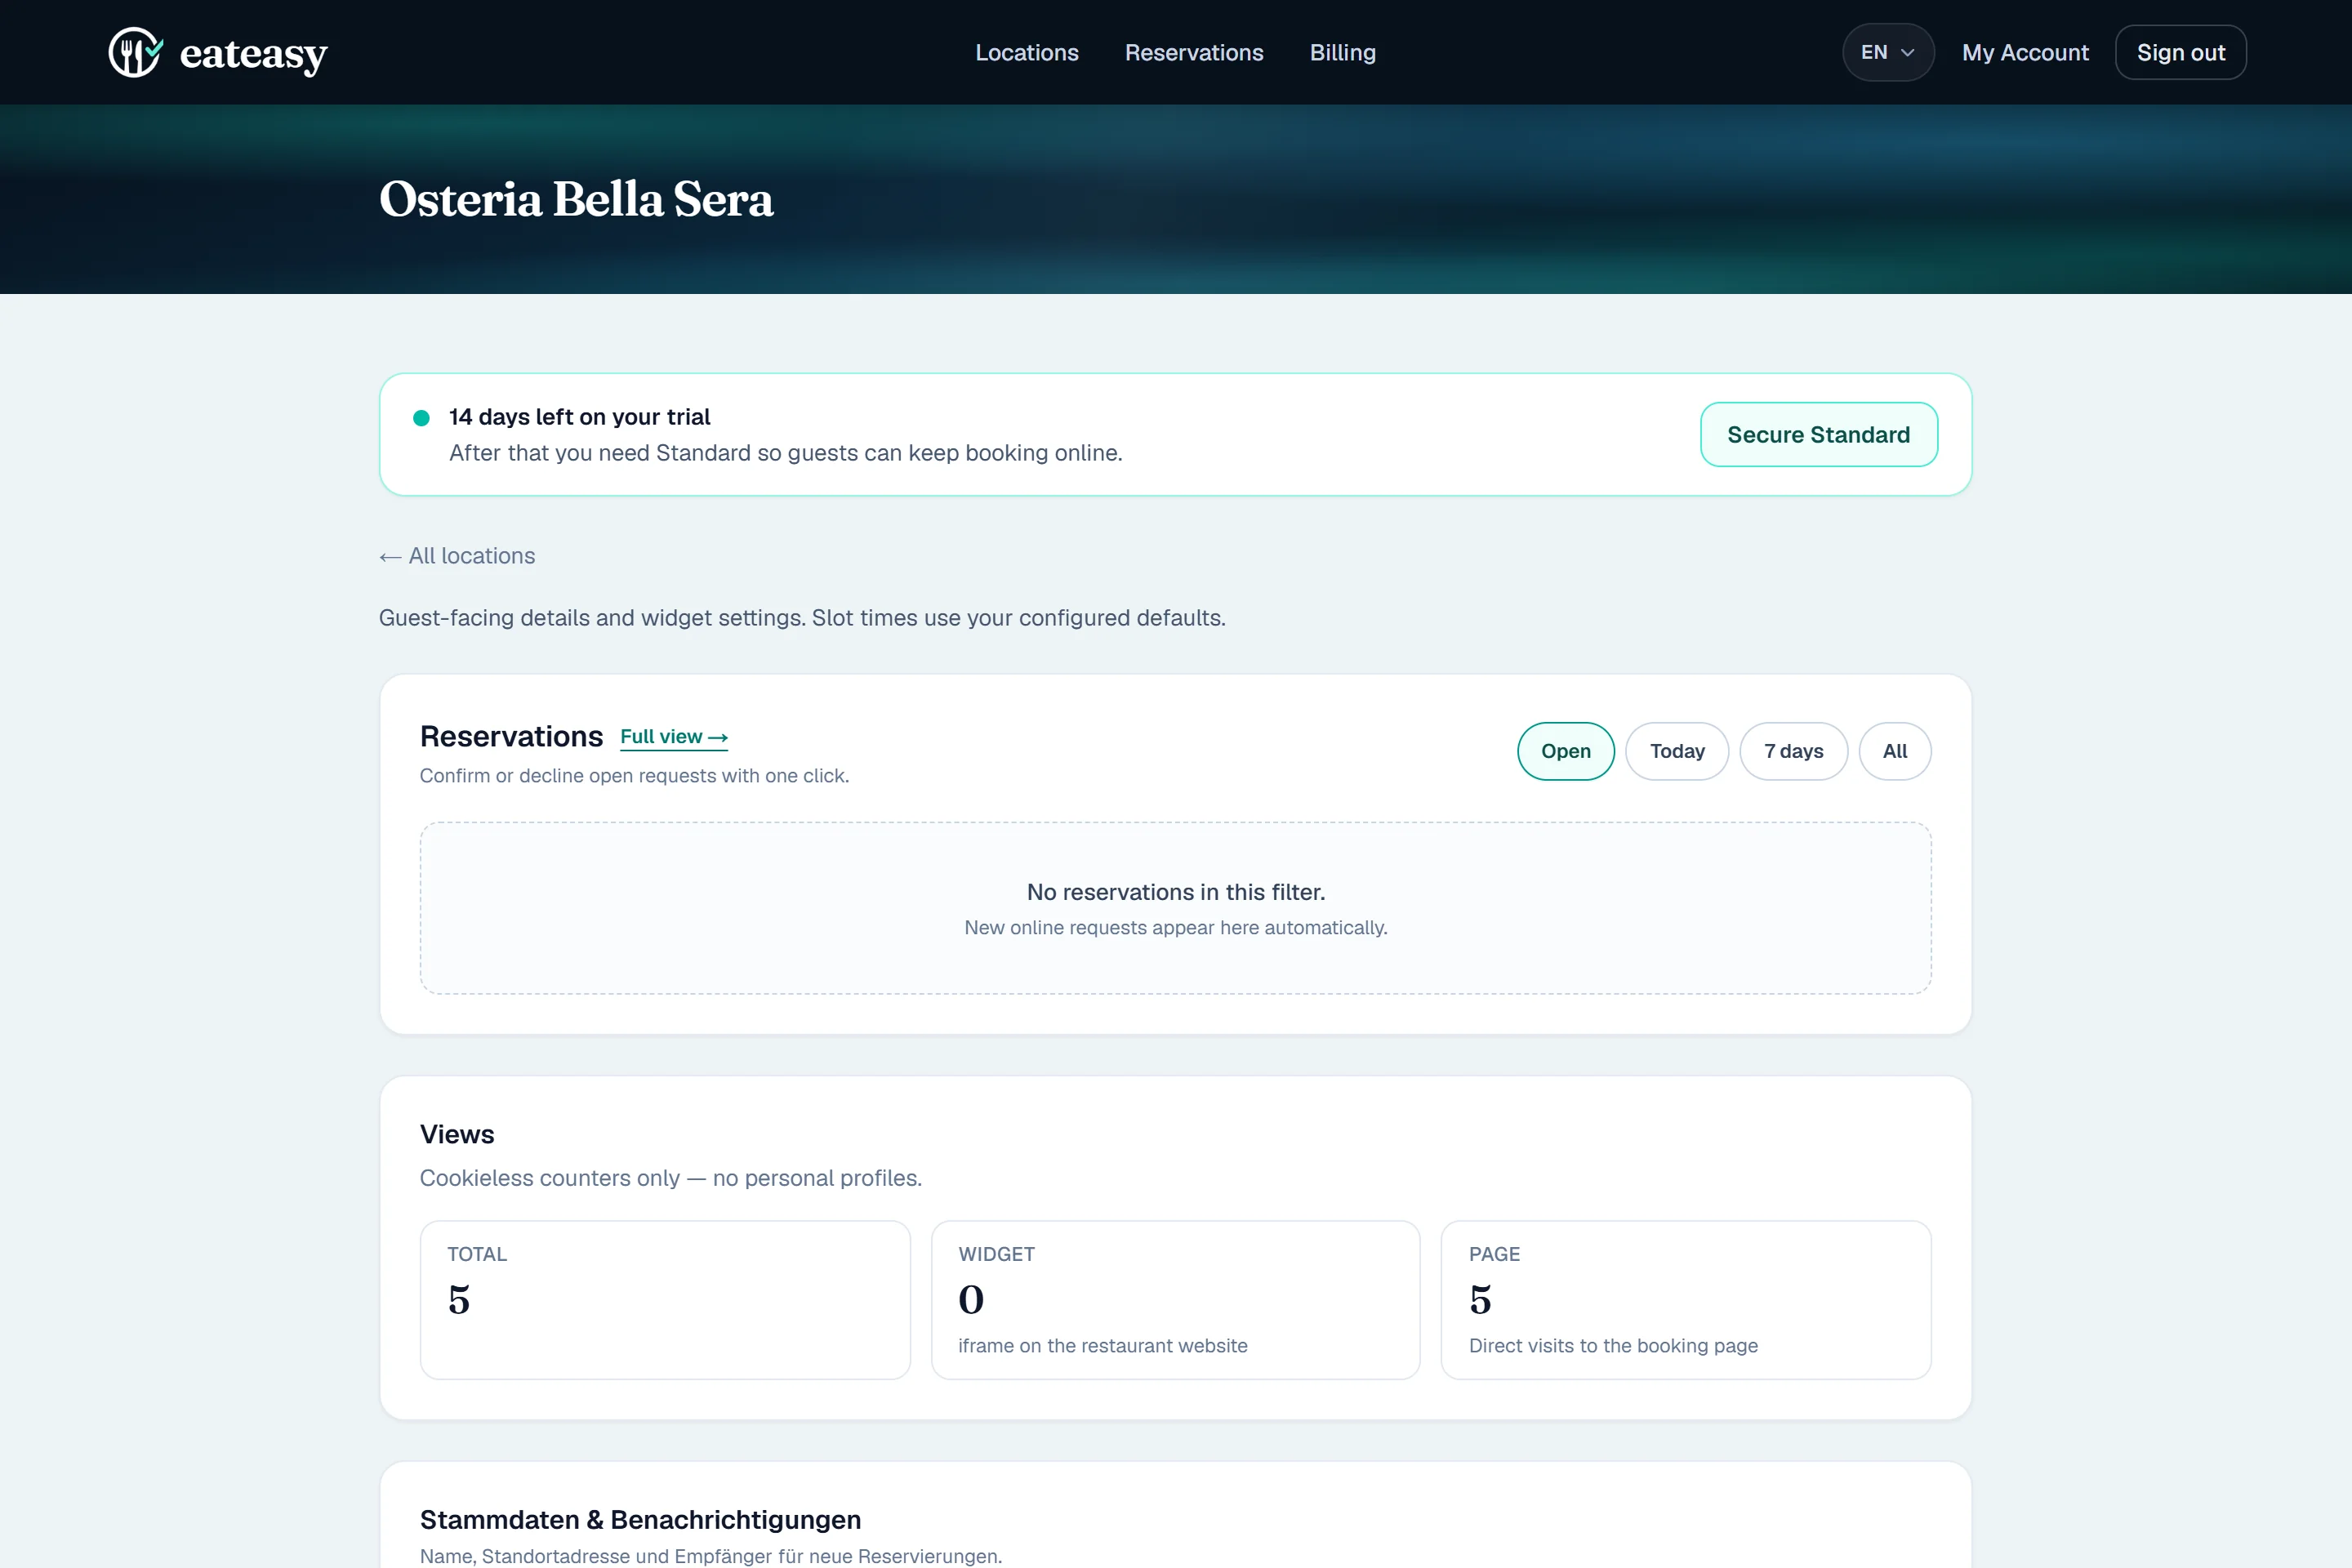
- ✓Instant confirmation by default; optionally switch to manual approval.
- ✓Waitlist for full slots can be toggled on or off anytime.
8 · Distribution
Embed on Website, Google Maps, Instagram & QR Code
Under Embed & Help, grab ready-to-copy instructions for website iframes, Google Business Profile, Instagram bio links and table-tent QR codes.
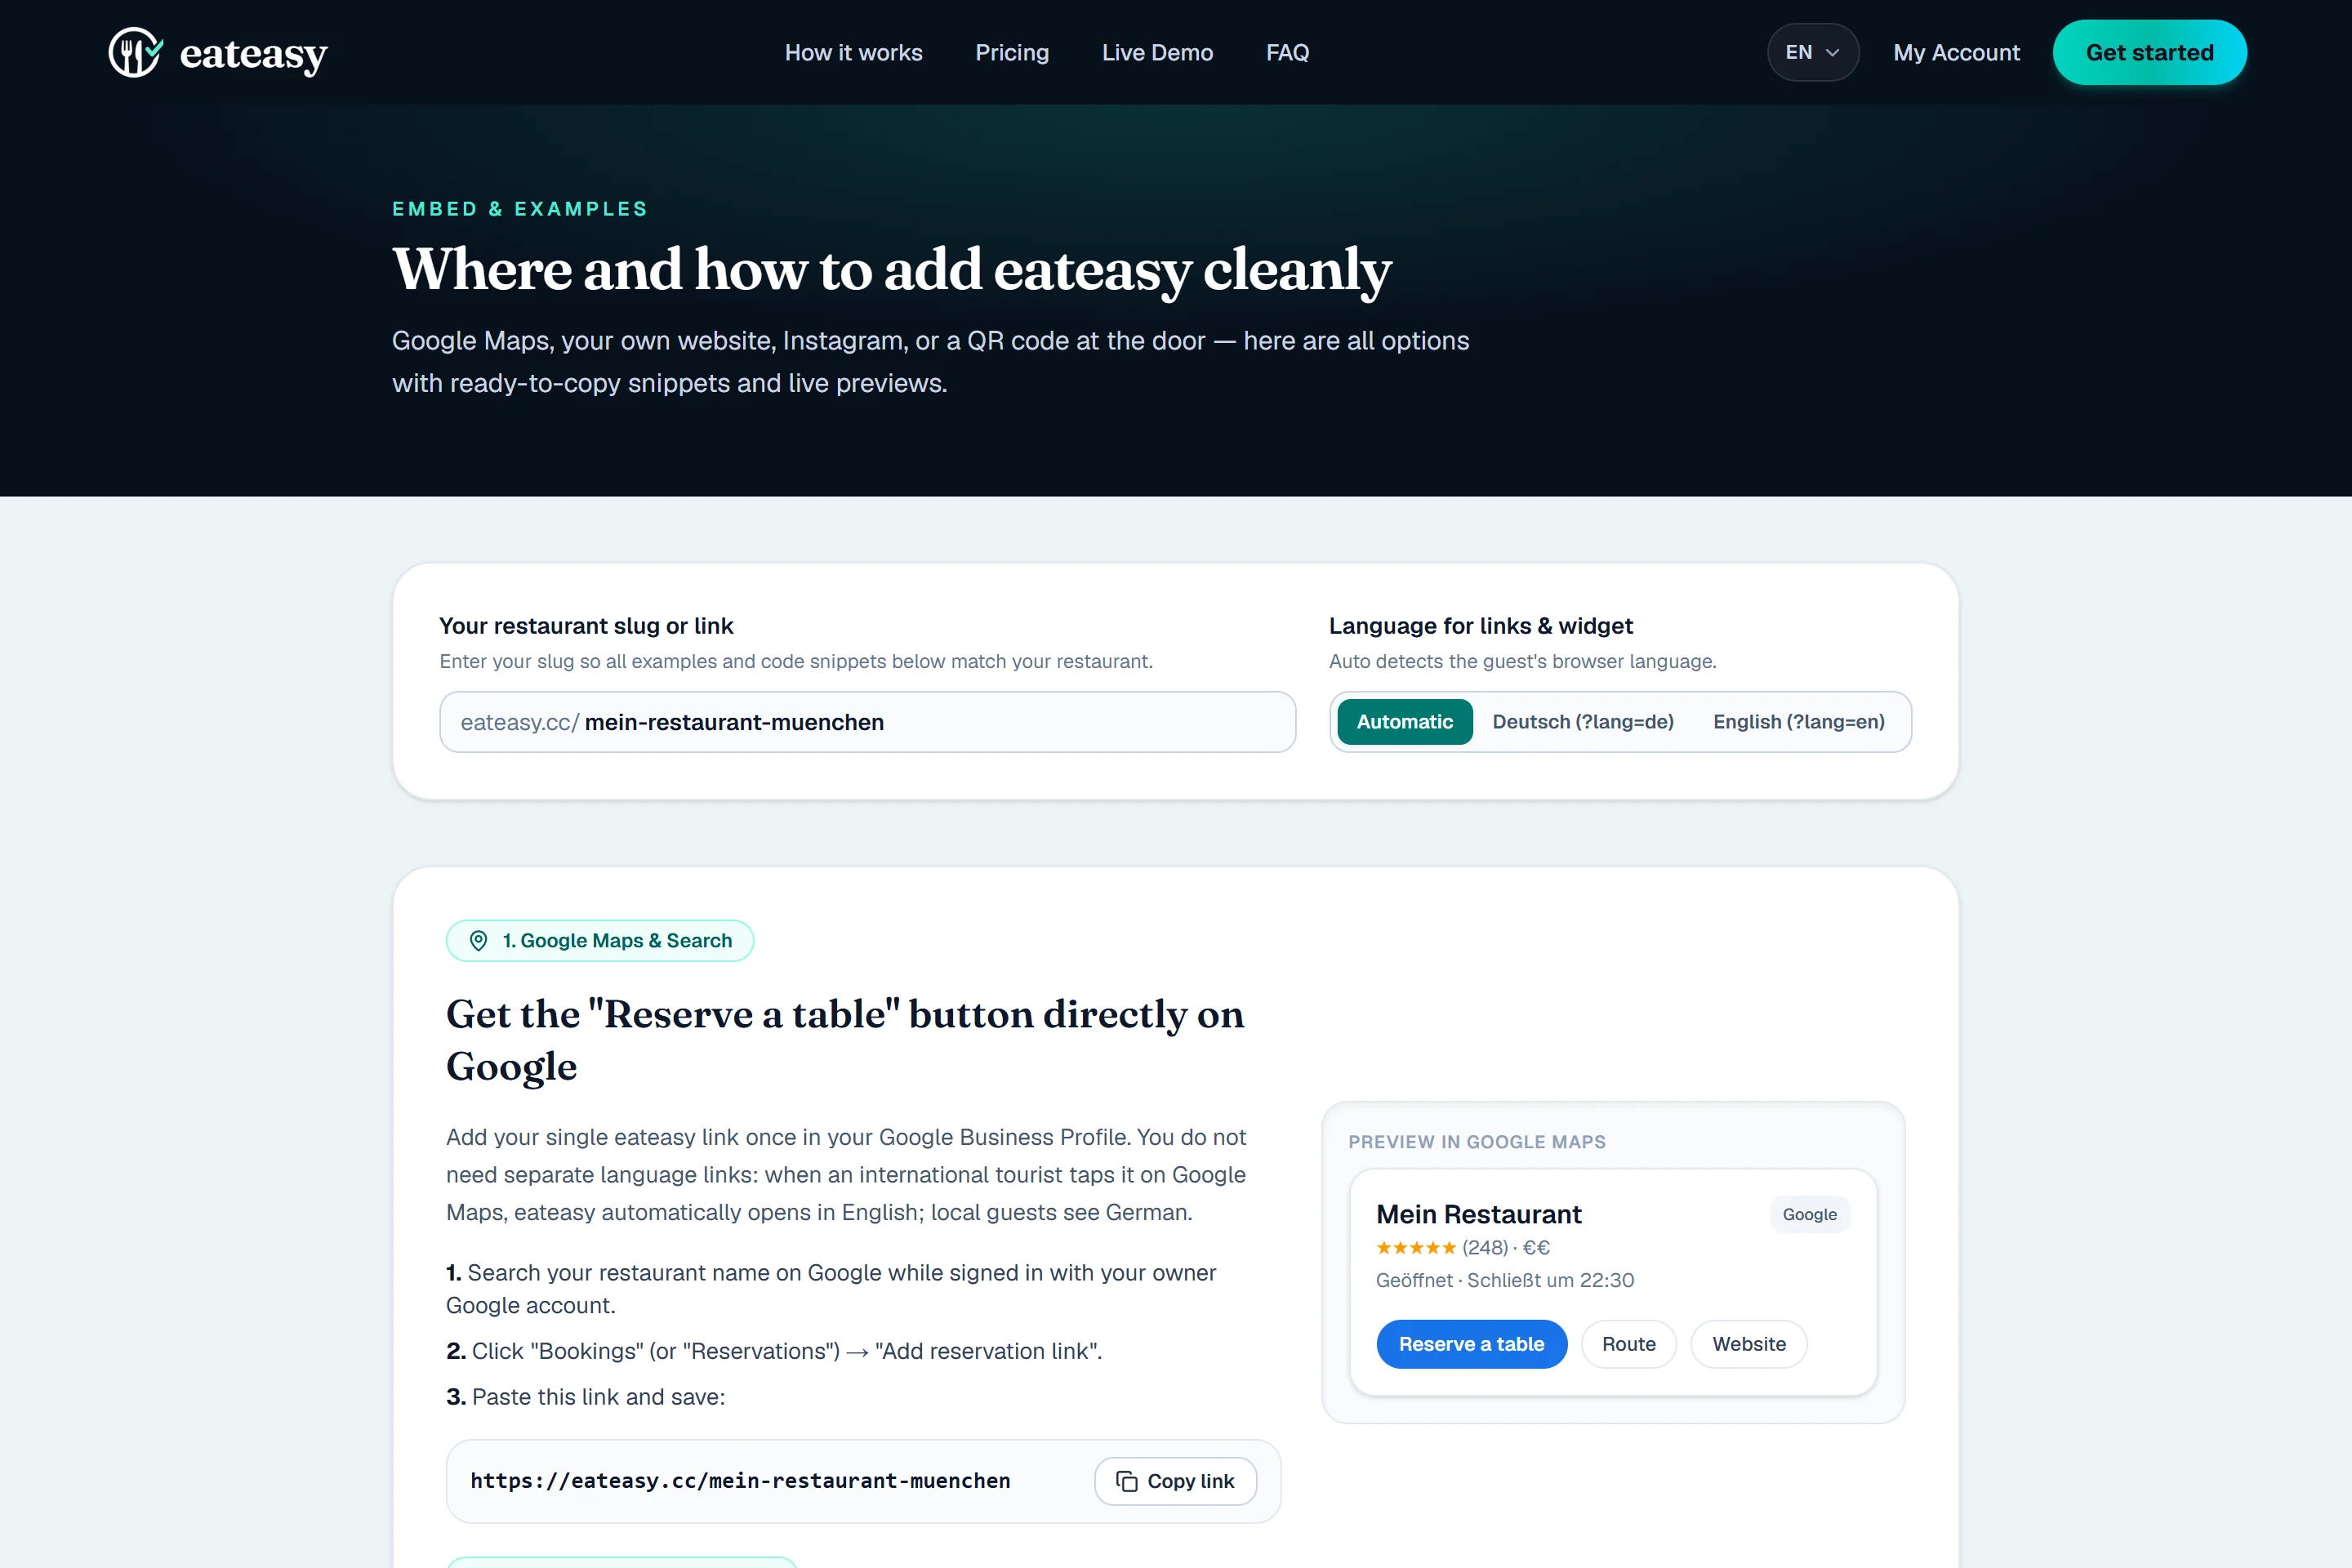
- ✓Direct link, website widget and QR code included at no extra cost.
9 · Guest Perspective (Steps 1 & 2)
Guests, Date & Time — in Seconds
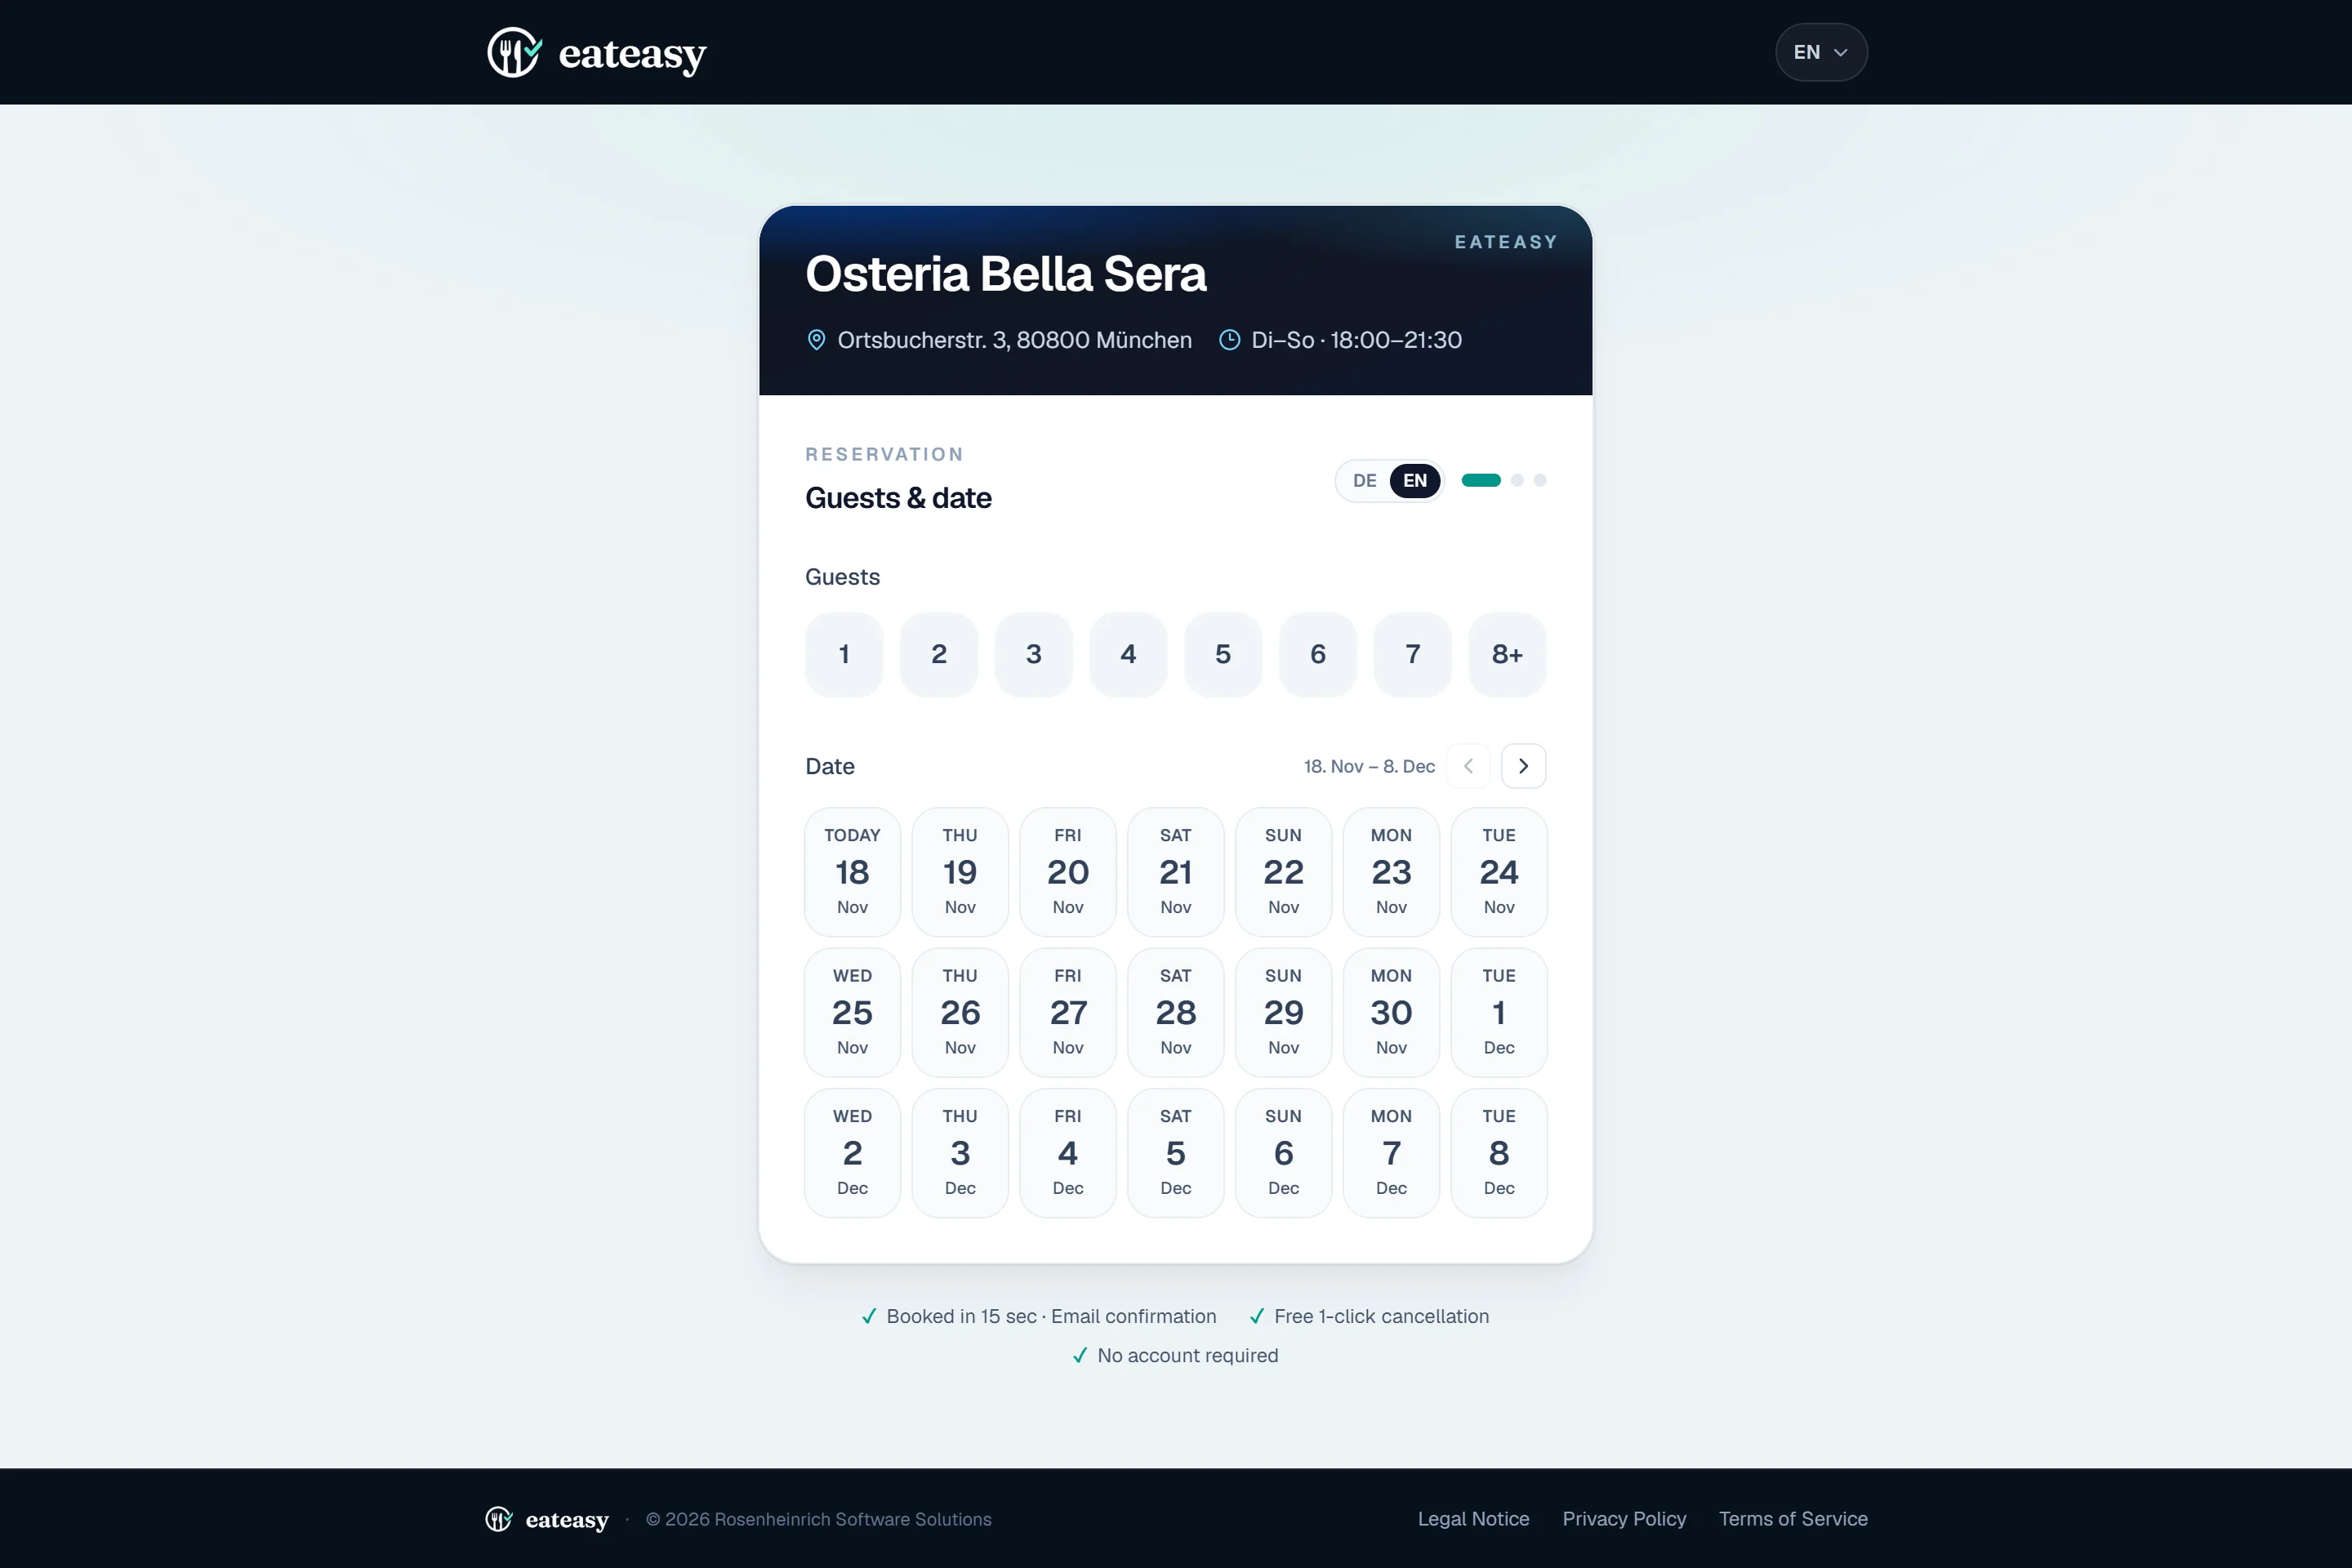
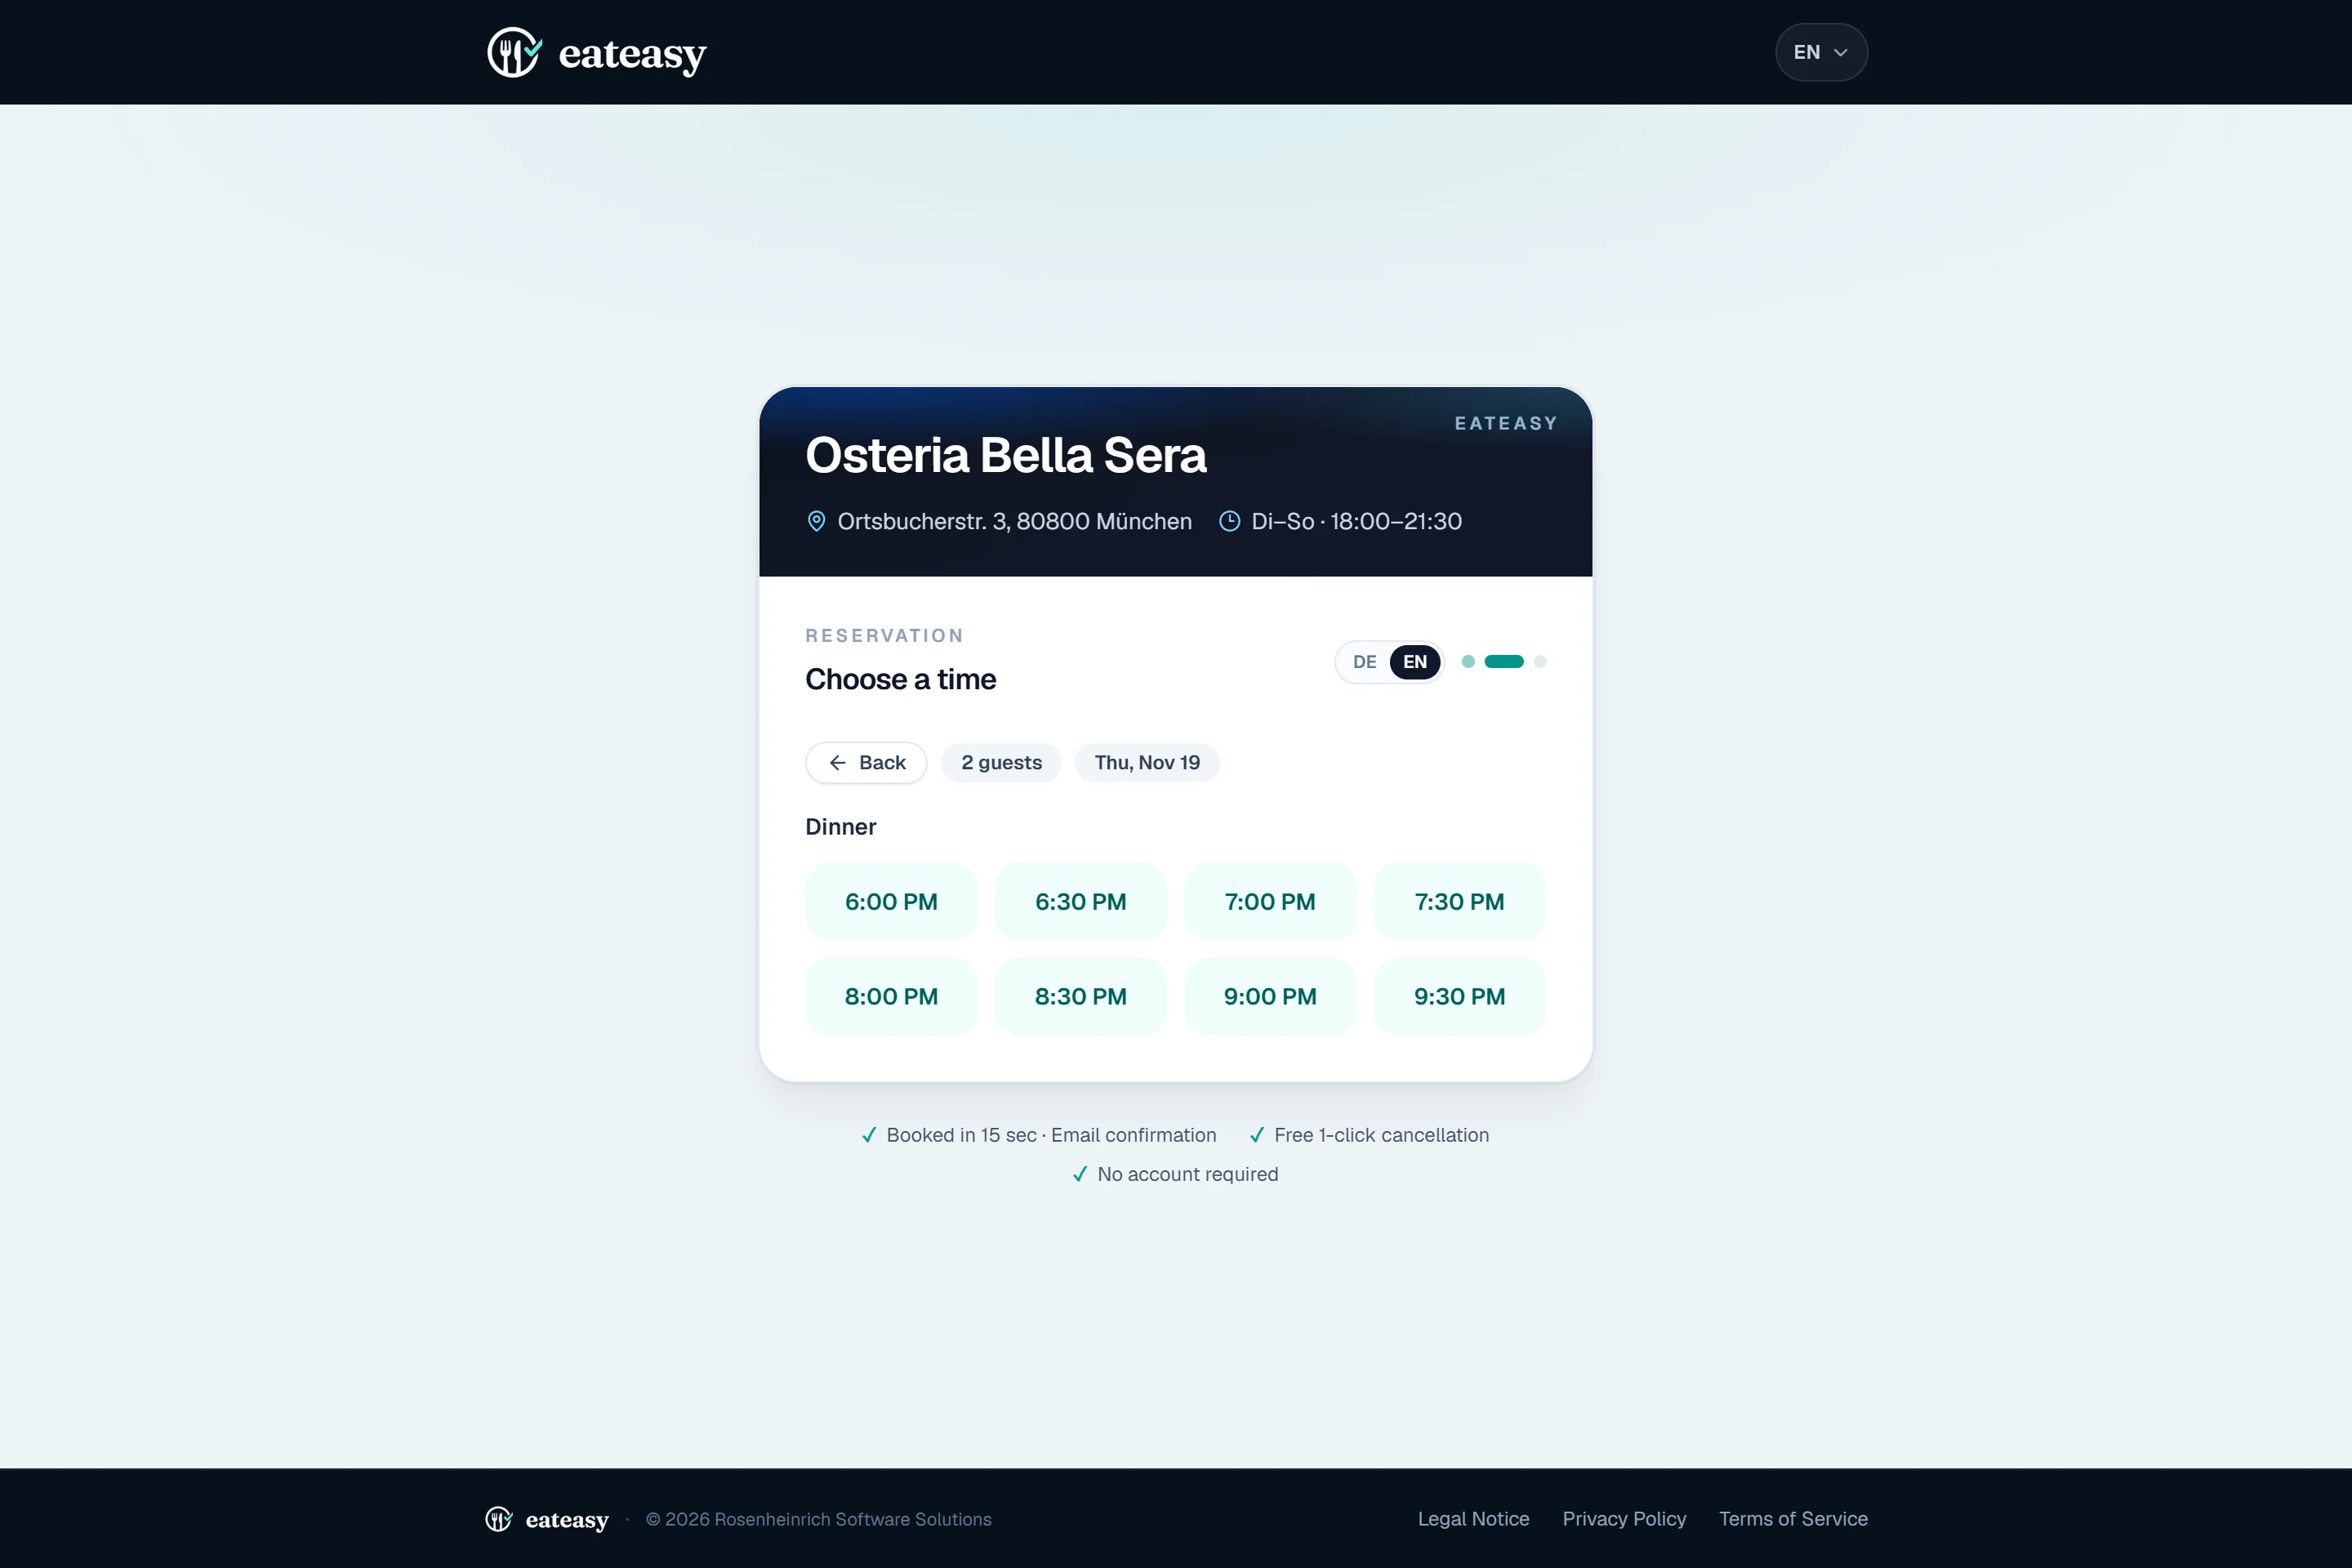
Regular guests only see your restaurant and the streamlined booking flow (no login wall, no portal link). First they pick party size & date, then select an available time slot.
- ✓Compact on mobile with zero unnecessary scrolling.
- ✓Bilingual in German and English (DE / EN).
10 · Guest Perspective (Step 3)
Contact Details with Zero Account Friction
In step 3, guests simply enter their name, email, phone number and optional notes (e.g. high chair or allergies) — no registration or password required.
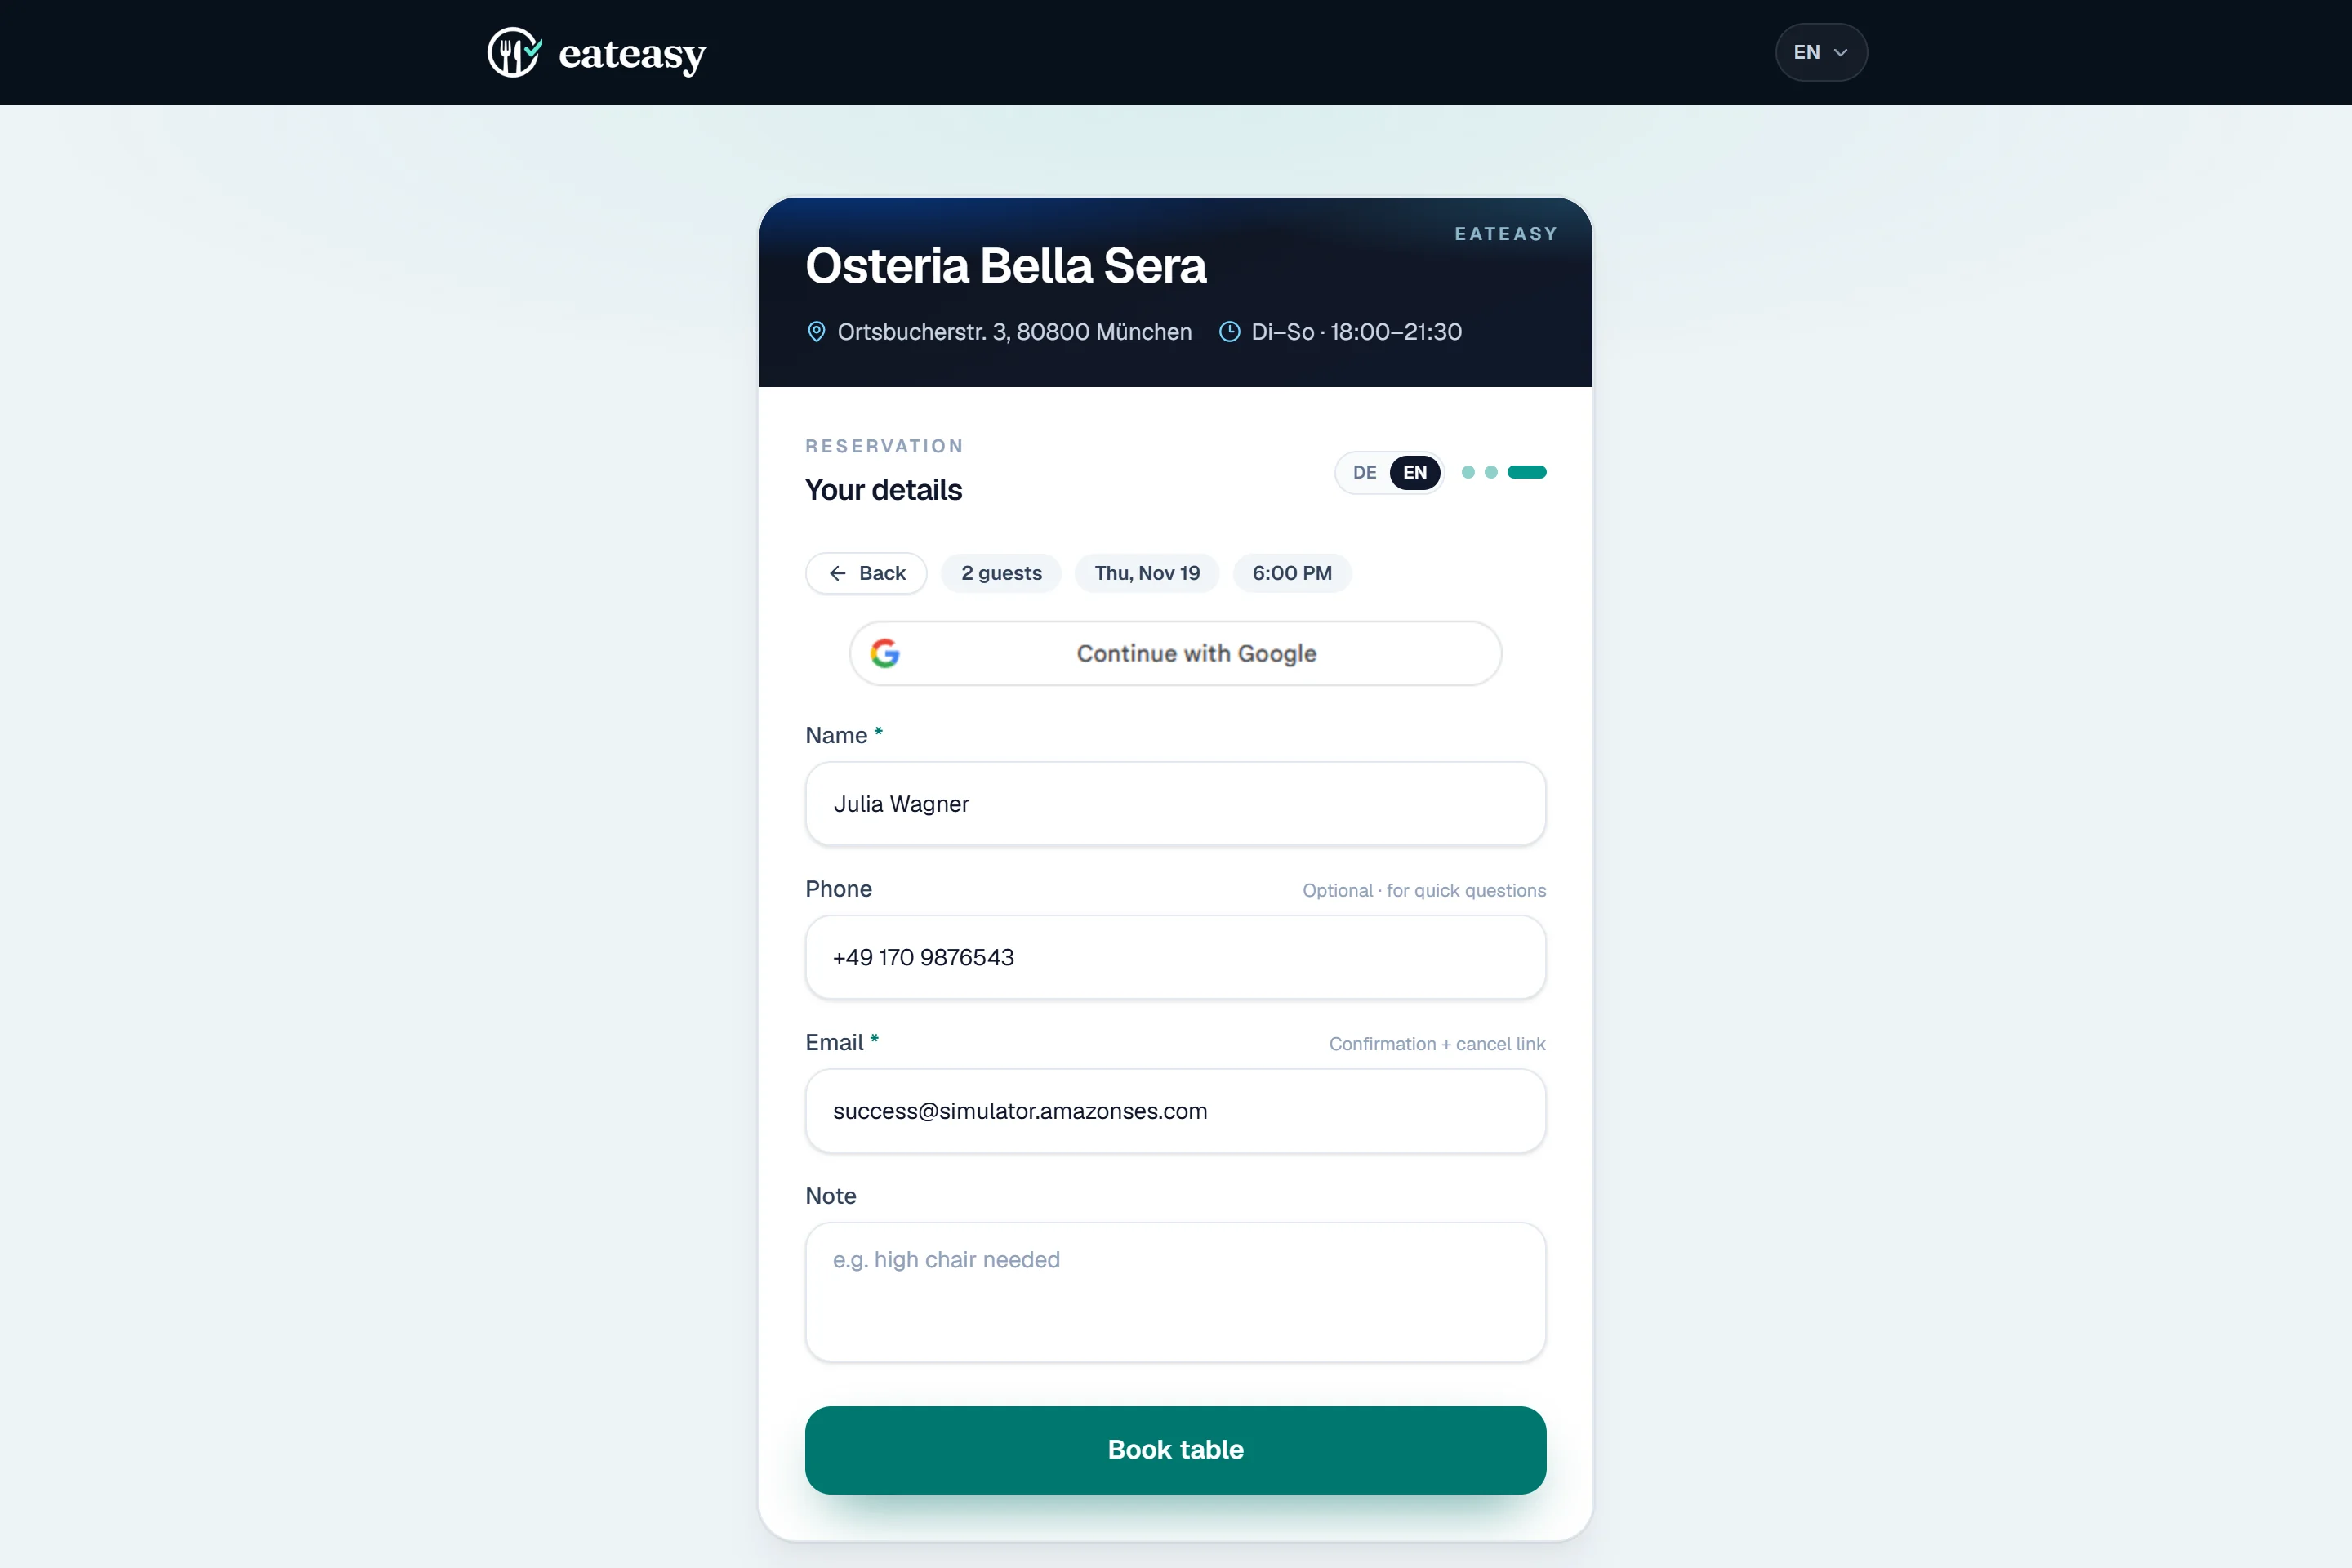
- ✓Optional guest notes appear straight in your reservation list and email alert.
11 · Booking Confirmation (Step 4)
Instant Confirmation & 1-Click Cancel Link
Right after submitting, the guest sees their confirmed booking with time, party size and restaurant address — and receives the same details plus a 1-click cancel link via email.
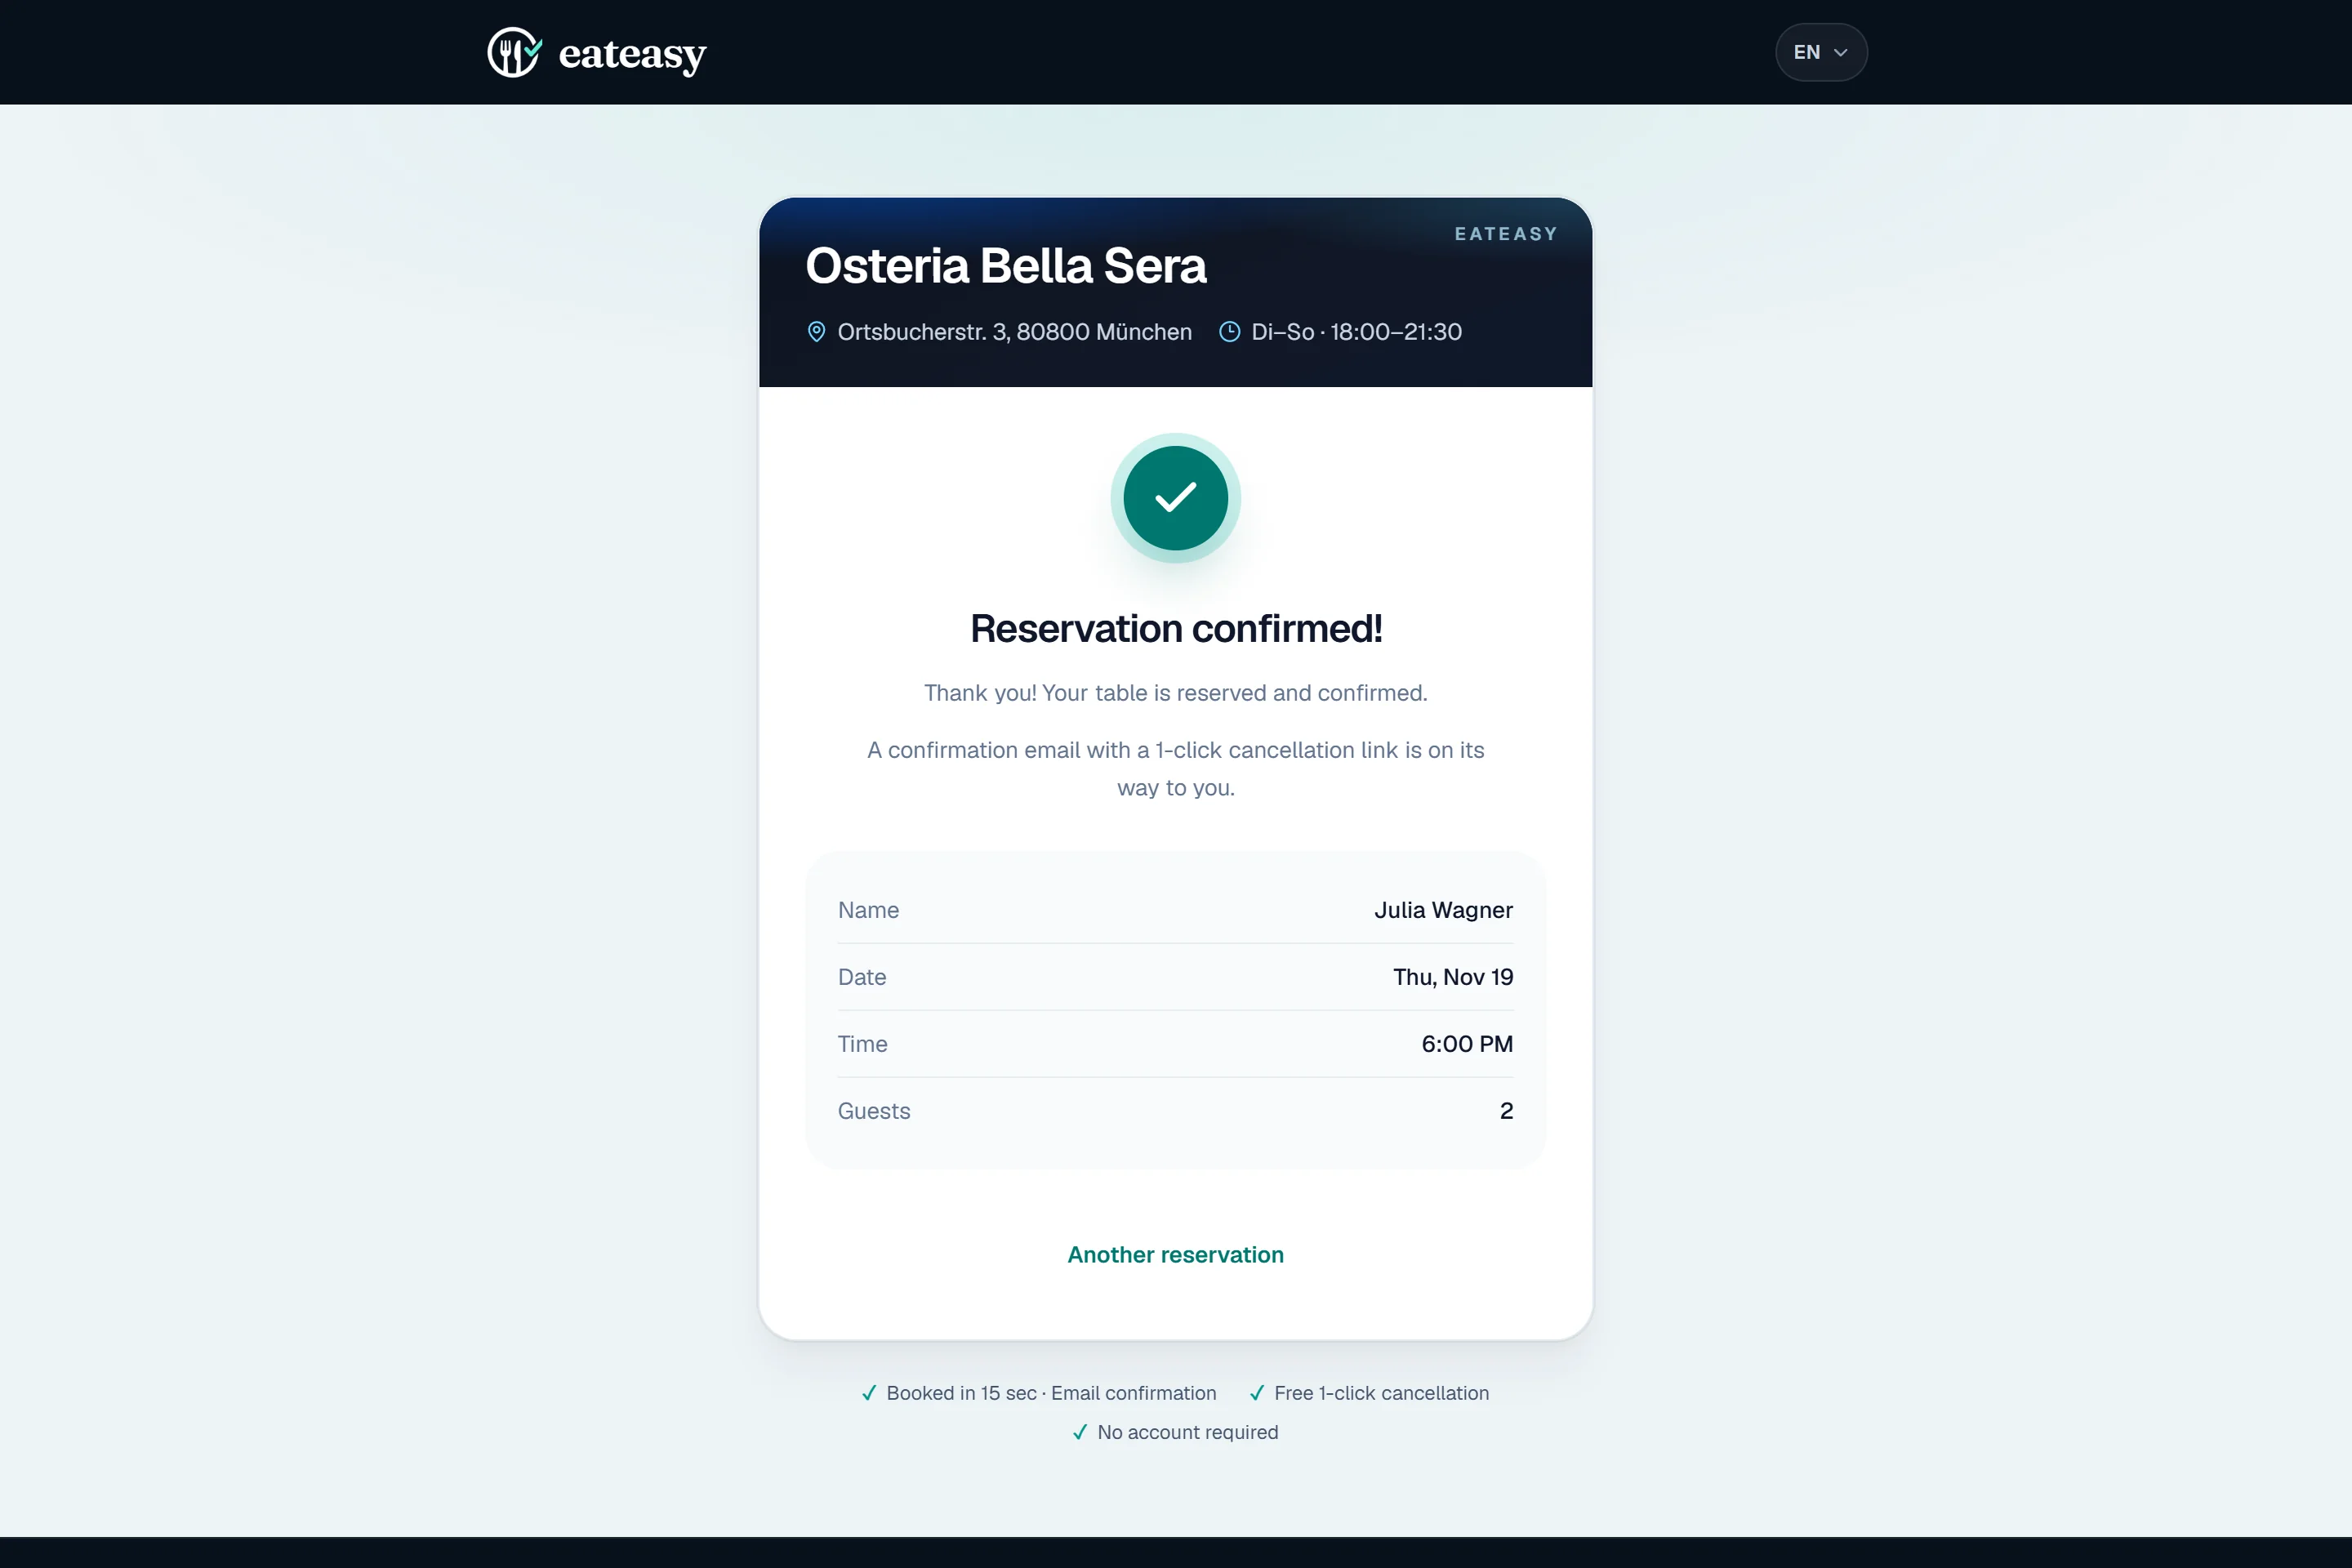
- ✓No follow-up calls — guest and restaurant are immediately in sync.